.svg)


Key Takeaways
- Organize Figma files early to reduce confusion and speed workflow.
- Auto Layout helps create responsive designs with less manual effort.
- Components and variants remove repetitive work and ensure design consistency.
- Shortcuts, plugins, and AI tools significantly improve design efficiency.
- Simple workflows and reusable systems help designers work much faster.
Every extra click in Figma is quietly draining your design time. That’s why mastering the ways to design faster in Figma matters. It can transform slow, cluttered workflows into a streamlined system that keeps pace with your thinking.
Clean file structure, Auto Layout, and reusable components are some of the fastest ways to eliminate repetitive work and keep your designs scalable. You can also use variables and smart plugins to make your workflow smoother, more organized, and significantly faster without constant manual adjustments.
Want to know more clever ways to design faster? Keep reading, because the rest of this guide breaks down exactly how to turn Figma into a fast, efficient design system you can actually rely on.
Organize Your Figma Workspace Before Designing
Before you design a single button, take a moment to organize your Figma file. A messy file slows everything down. You waste time searching for layers, hunting for assets, and figuring out where things belong.
A clean and structured file removes all that friction and lets you focus on actual designing:
Create Reusable File Structures
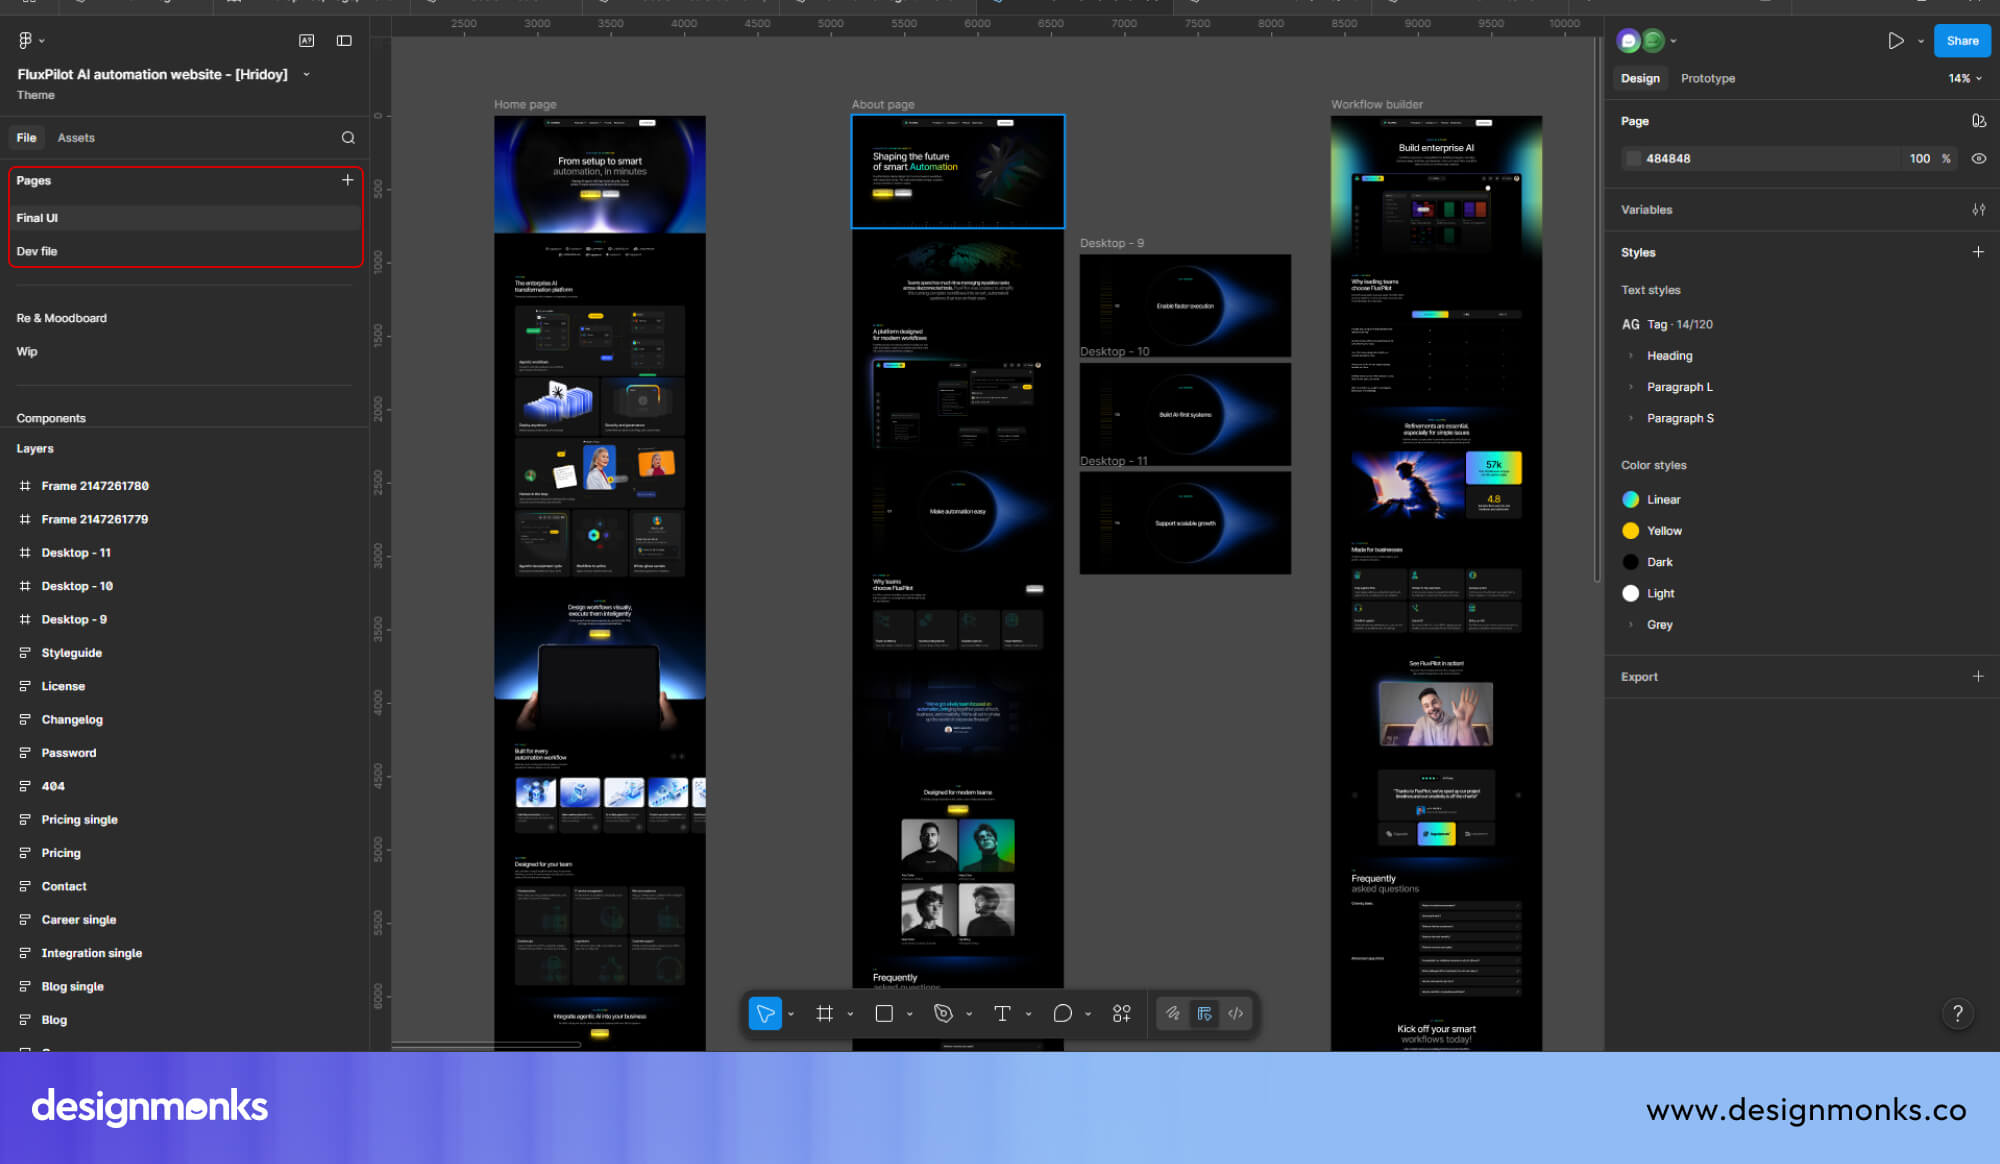
Think of your Figma file like a notebook. When every page has a purpose, finding things becomes effortless. Set up the same page order for every project. For example, Cover, Design, Components, and Archive.
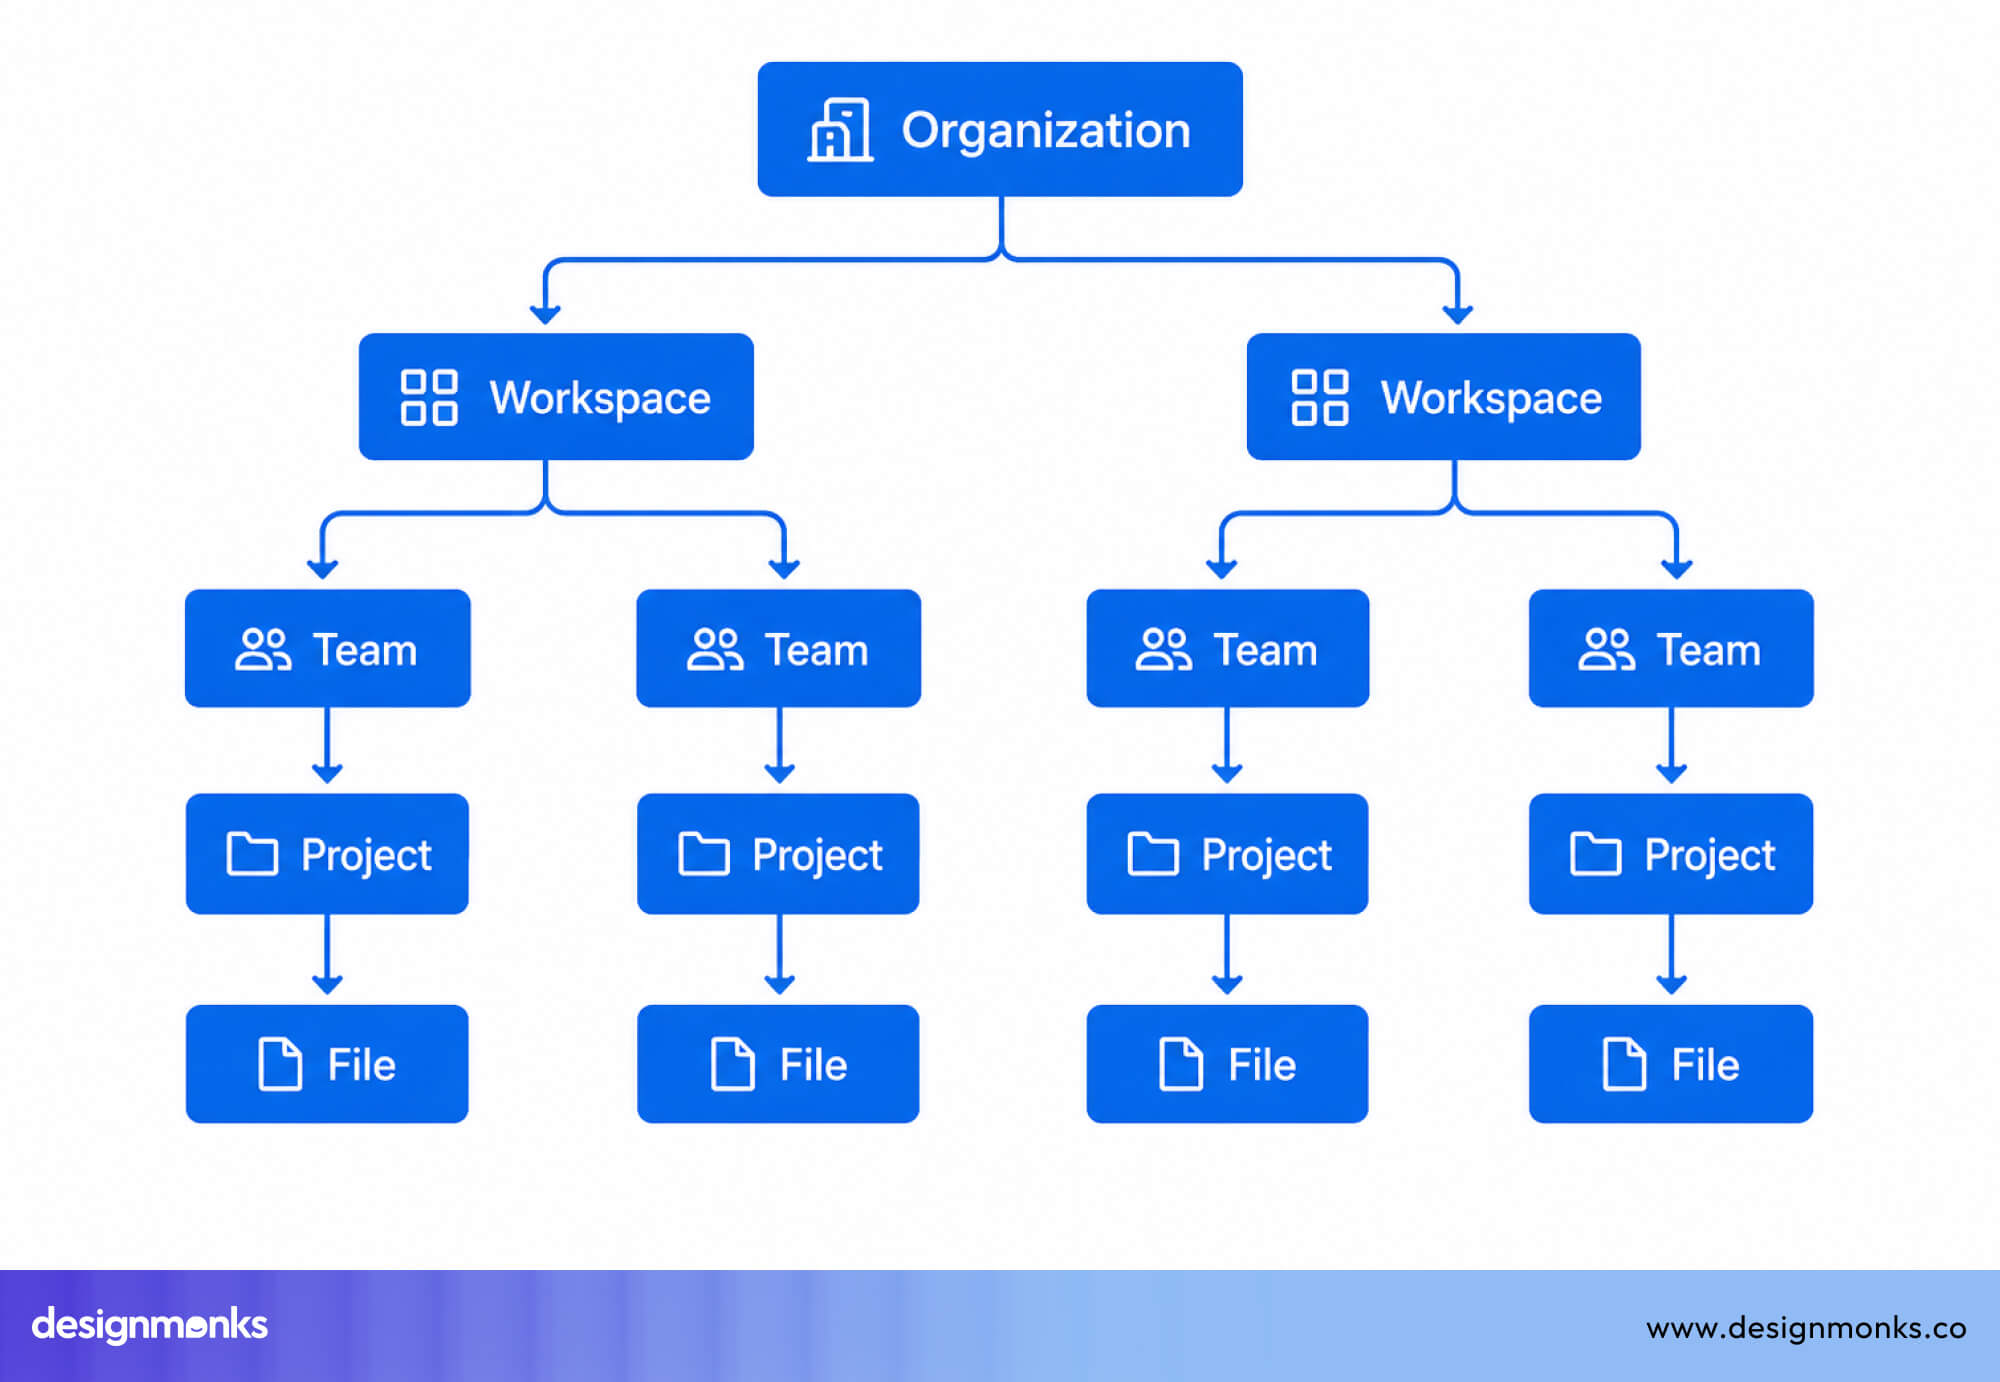
This way, you always know where everything lives. Using ready-made template files for similar projects saves even more time since you are not starting from zero every single time.
Use Clear Naming Conventions
Naming your frames, layers, and components properly is a game-changer. Instead of leaving things as "Frame 47" or "Rectangle 3," give them real names like "Homepage Header" or "Primary Button."
Group related sections together so your file makes sense to anyone who opens it, including future you. Good naming also makes searching inside Figma much faster.
Keep Frequently Used Assets Easy to Access
Pin the pages you visit most so they appear at the top. Keep your design system organized and easy to find. It should be a collection of reusable colors, fonts, and components. The less time you spend navigating, the more time you spend creating.
Master Auto Layout for Faster Responsive Design
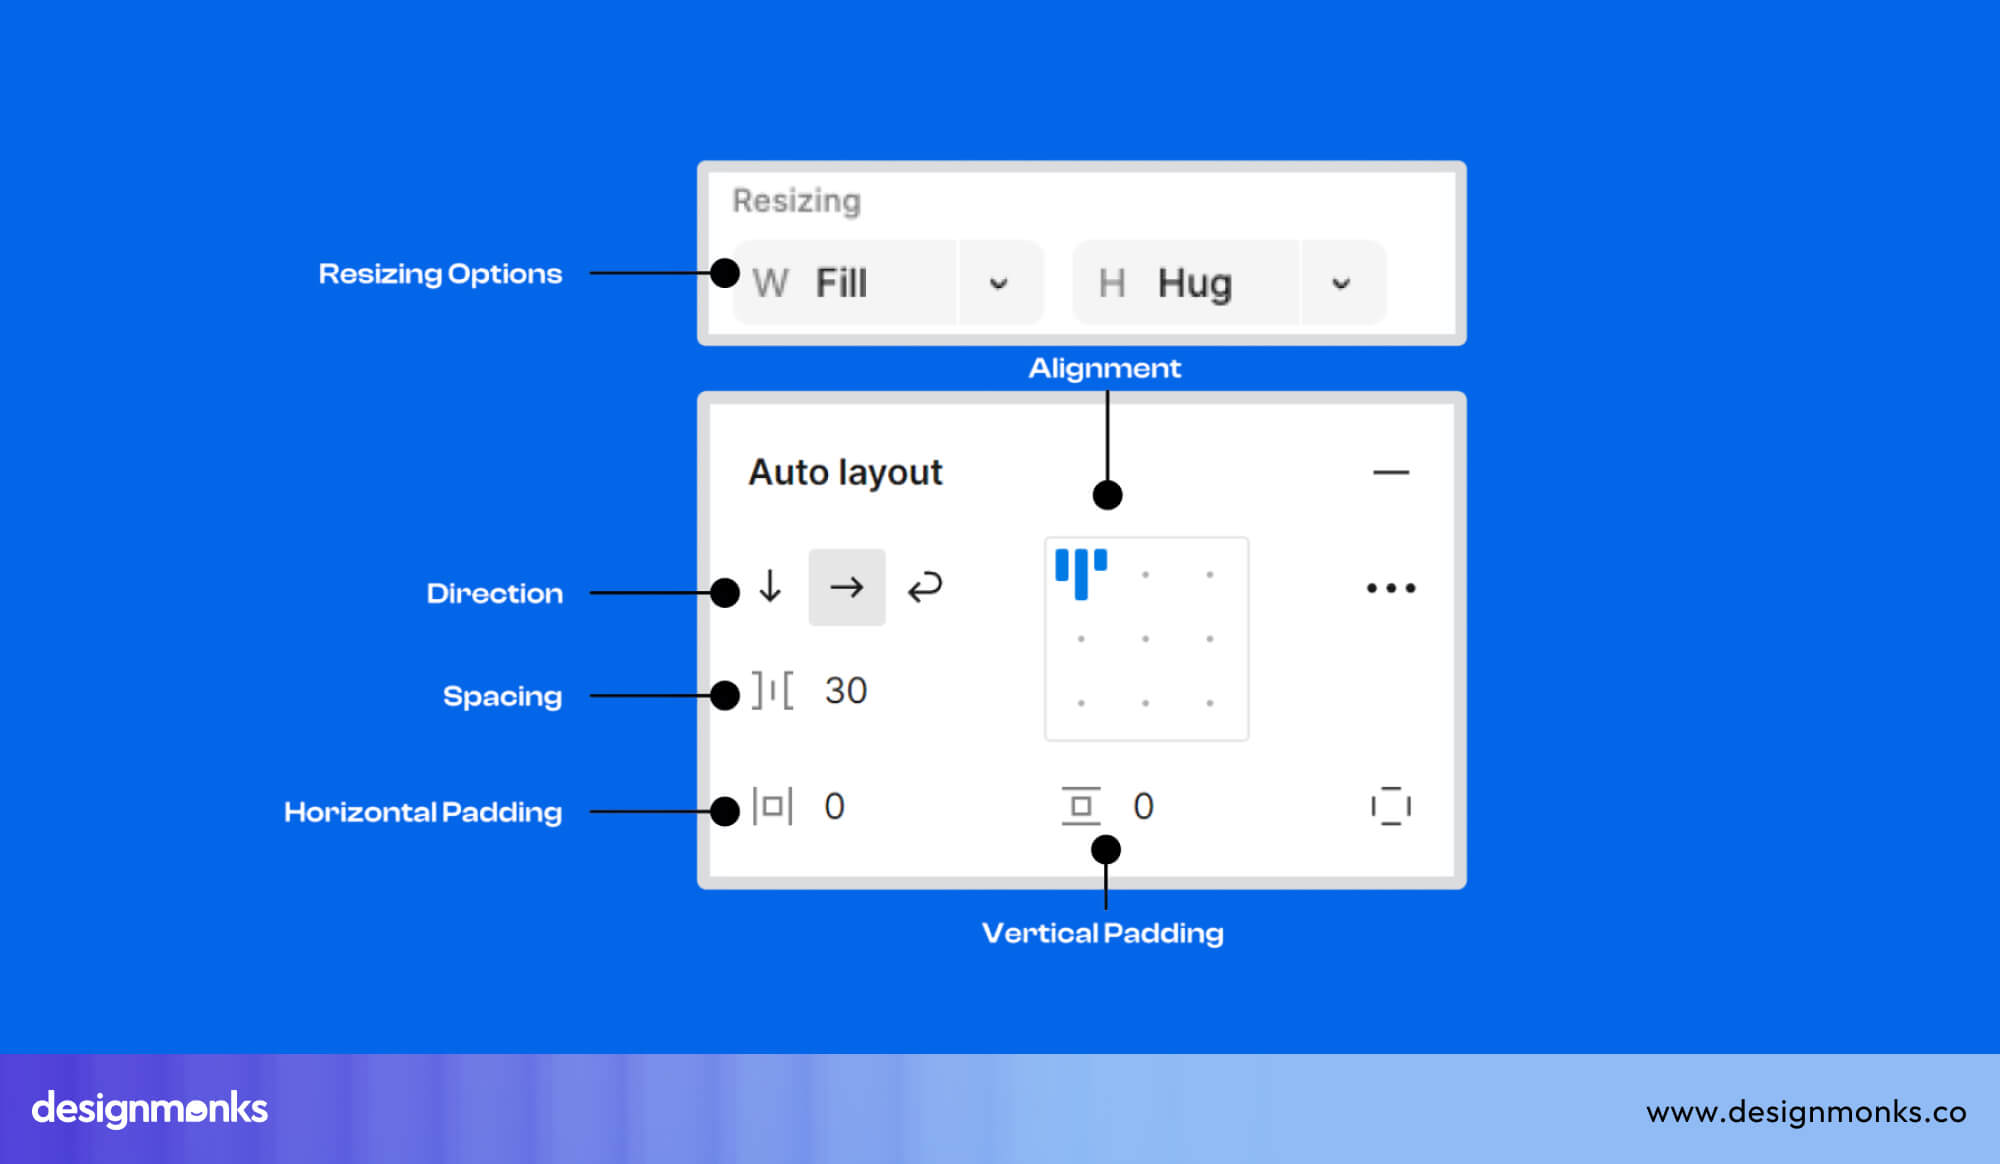
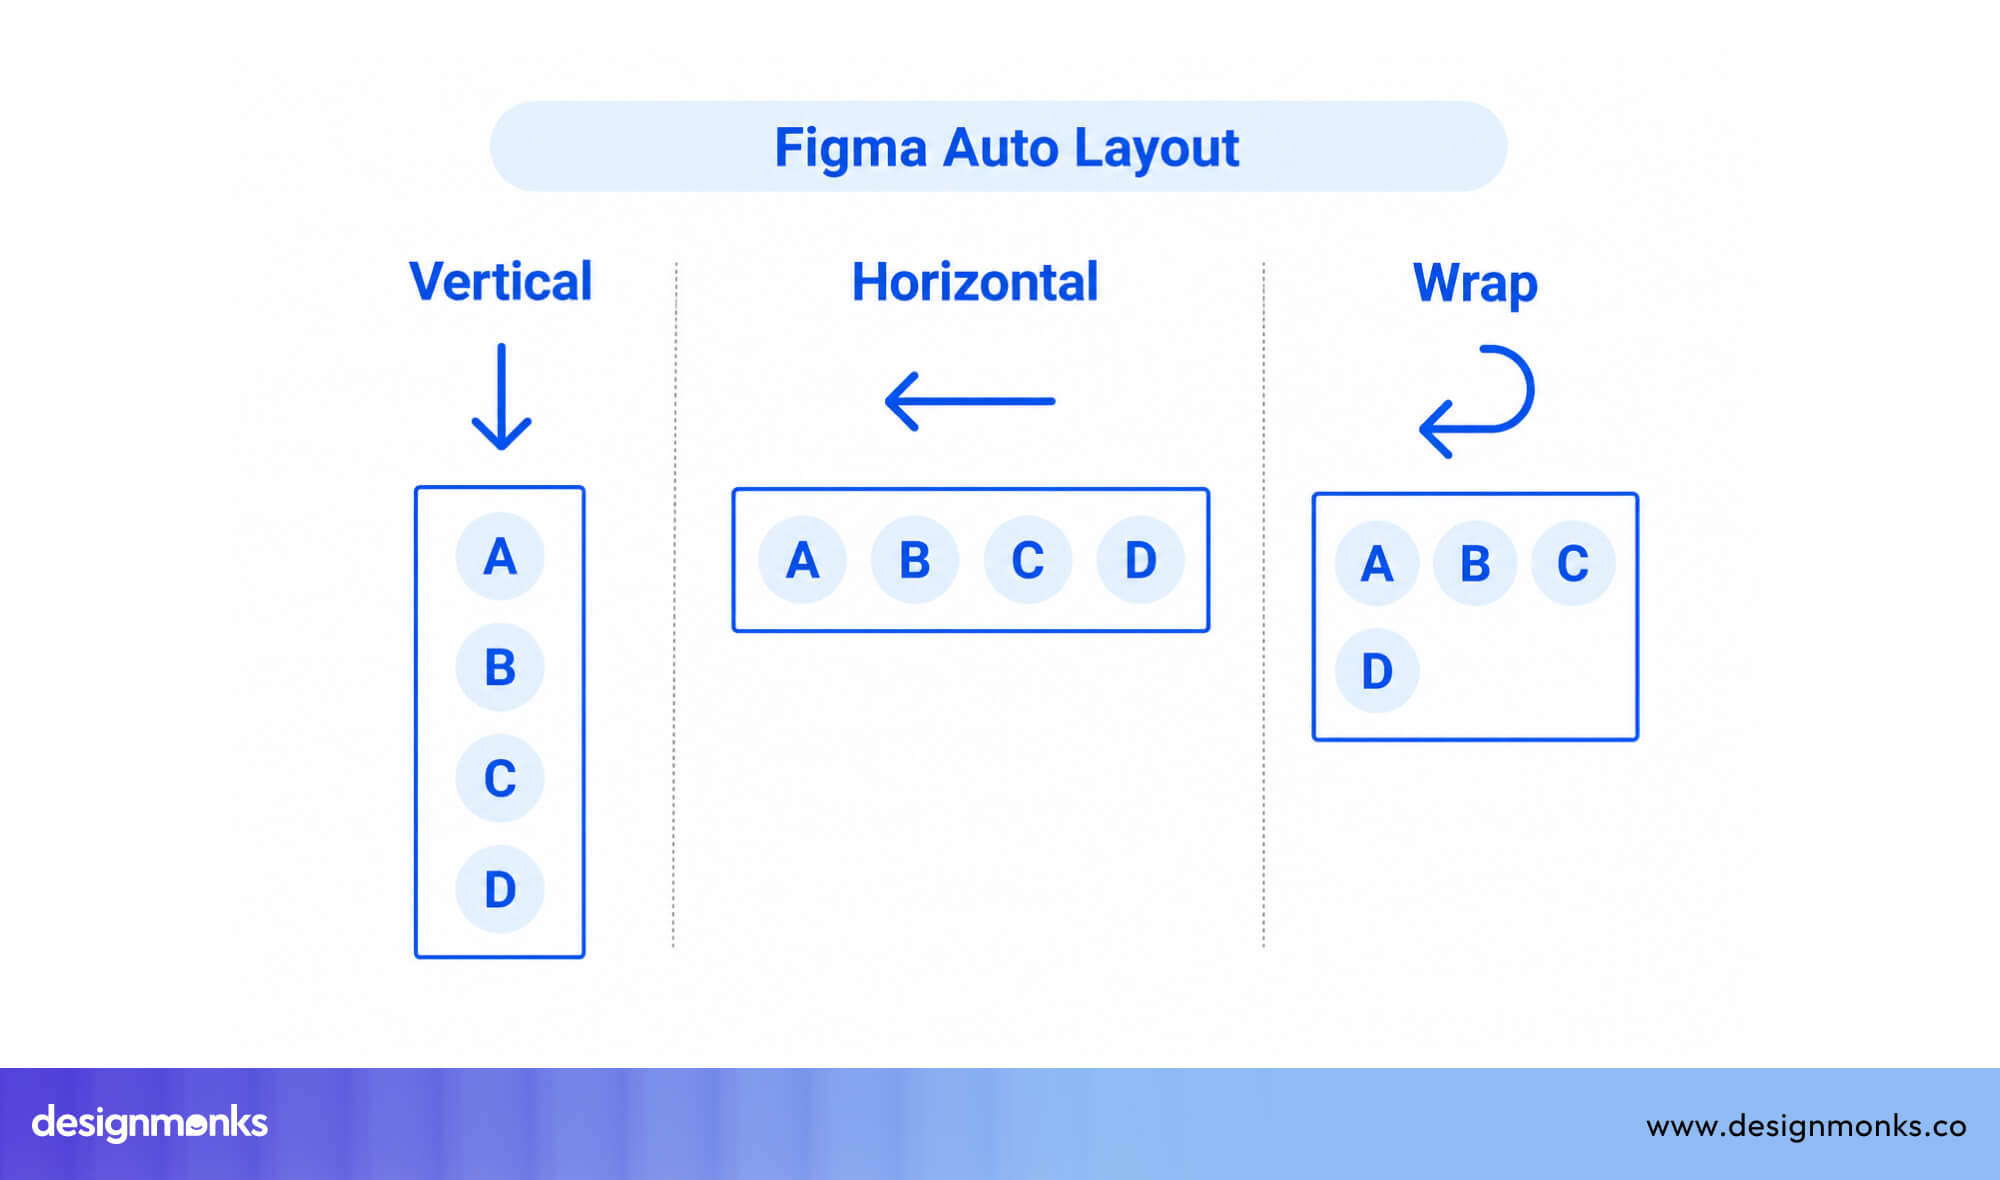
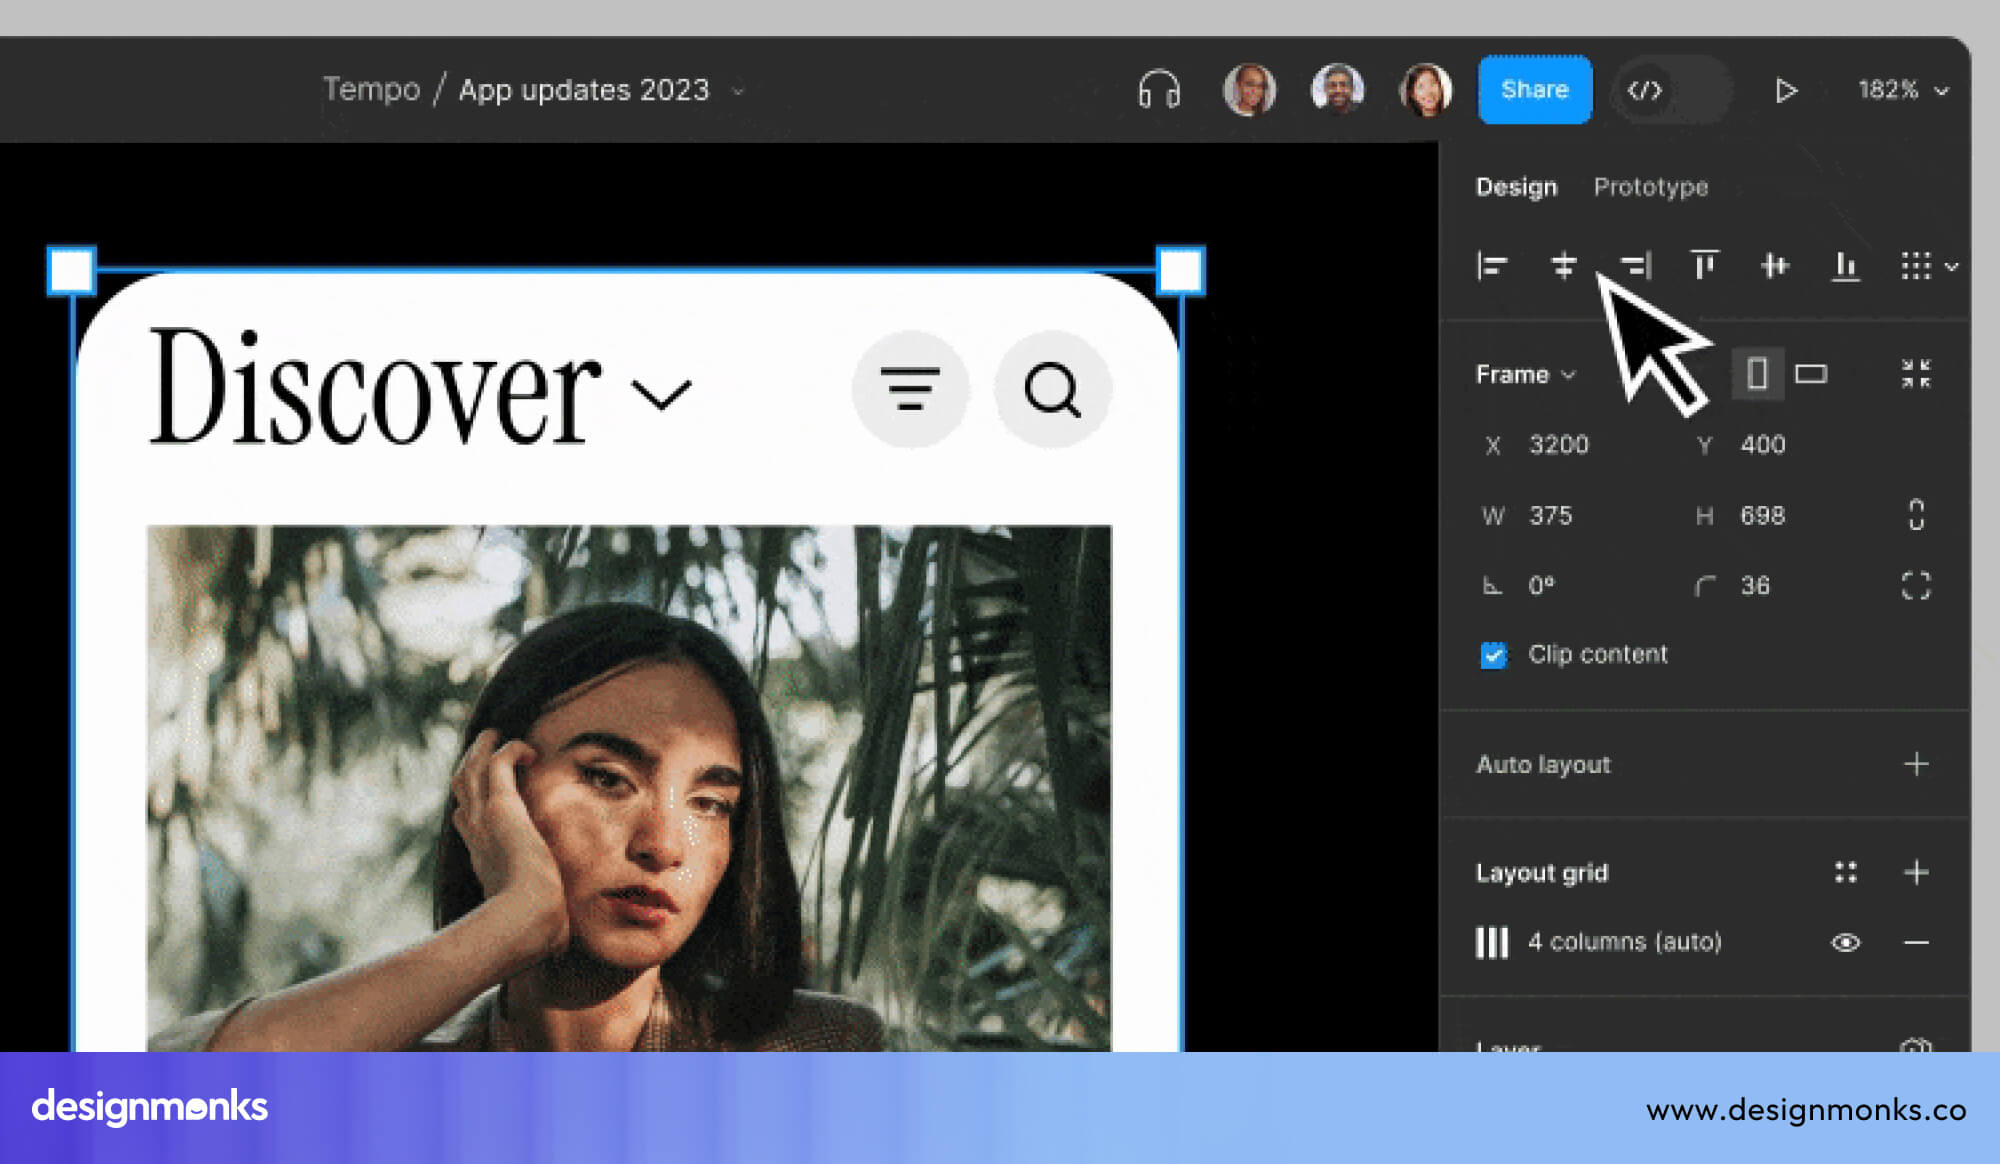
Resizing elements manually and fixing spacing after every small change can take up a lot of time, and this is where most designers start to feel stuck. To solve this, Figma offers a feature called Auto Layout. It is a feature that automatically controls spacing and alignment inside your design frames.
When content changes, Auto Layout adjusts everything around it without you touching a thing. This means less repetitive work and faster design sessions overall.
Use Auto Layout Instead of Manual Spacing
The most immediate benefit of Auto Layout is that it eliminates manual repositioning. Without it, you have to move and reposition every element by hand whenever something changes.
Auto Layout lets you set spacing rules once, and Figma handles all the adjustments automatically after that. This helps you build flexible UI blocks(design sections that grow or shrink based on their content). Your spacing stays consistent across the entire design without you needing to check it repeatedly.
As a result, every round of edits becomes noticeably faster. Once you are comfortable using Auto Layout on individual elements, the next step is combining multiple layers of it together.
Build Nested Auto Layout Structures
You can place one Auto Layout frame inside another to build more complex layouts. A card can have a vertical Auto Layout controlling its internal content, while several cards sit inside a horizontal Auto Layout side by side.
This approach creates scalable interfaces, meaning designs that expand and reorganize without breaking. You build these sections once and reuse them across multiple screens, which reduces the amount of redesign work needed later.
Combine Auto Layout with Constraints
Constraints are settings that control how elements behave when the frame size changes. For example, you can make a navigation bar always stretch across the full width of the screen, no matter the size.
When you combine constraints with Auto Layout, your designs become truly responsive. Instead of adjusting layouts again and again for different screen sizes, everything adapts automatically.
In the end, this combination gives you a strong system that reduces manual work and helps you design faster with more confidence.
Use Components and Variants to Eliminate Repetitive Work
Recreating the same design element across multiple screens can quickly waste a lot of time, especially as your project grows. Instead of building everything again and again, Figma gives you a better way to handle this through components. Components let you design an element once and reuse it anywhere, so you can avoid repeating the same work.
When you update the original component, every copy across your entire file updates at the same time. This keeps your work consistent and cuts down production time considerably.
Turn Repeated UI Elements into Components
To get the most value from this, you should turn anything you reuse into a component.
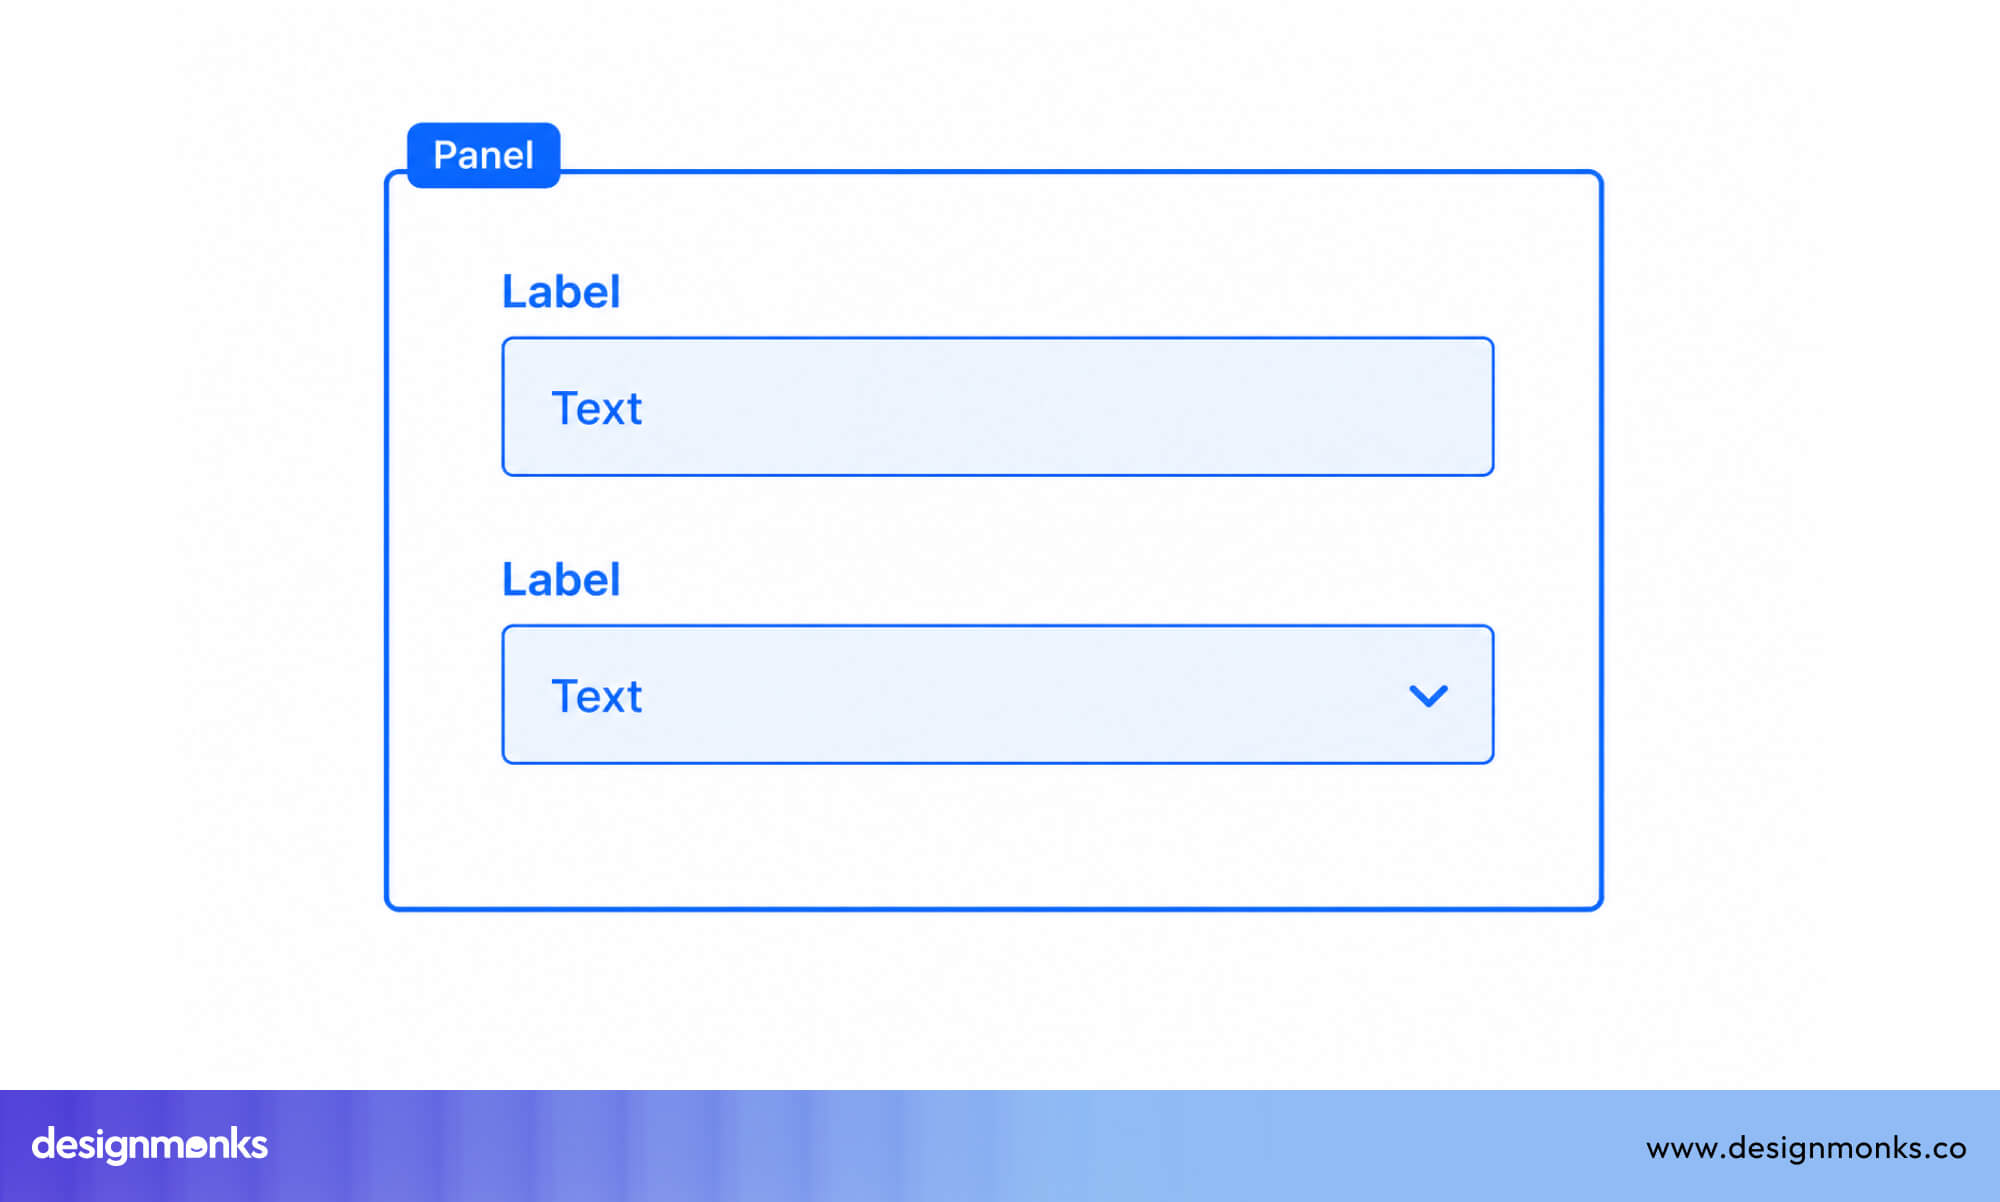
Buttons are a simple example since they appear on almost every screen. Cards are used to display content like products or articles. These should also be reusable. Navigation bars stay the same across pages, and form elements like text inputs or dropdowns are used again and again.
By turning these into components, you only need to design them once, and any future changes can be made in a single place. Once you start using components regularly, the next step is organizing different versions of the same element more efficiently.
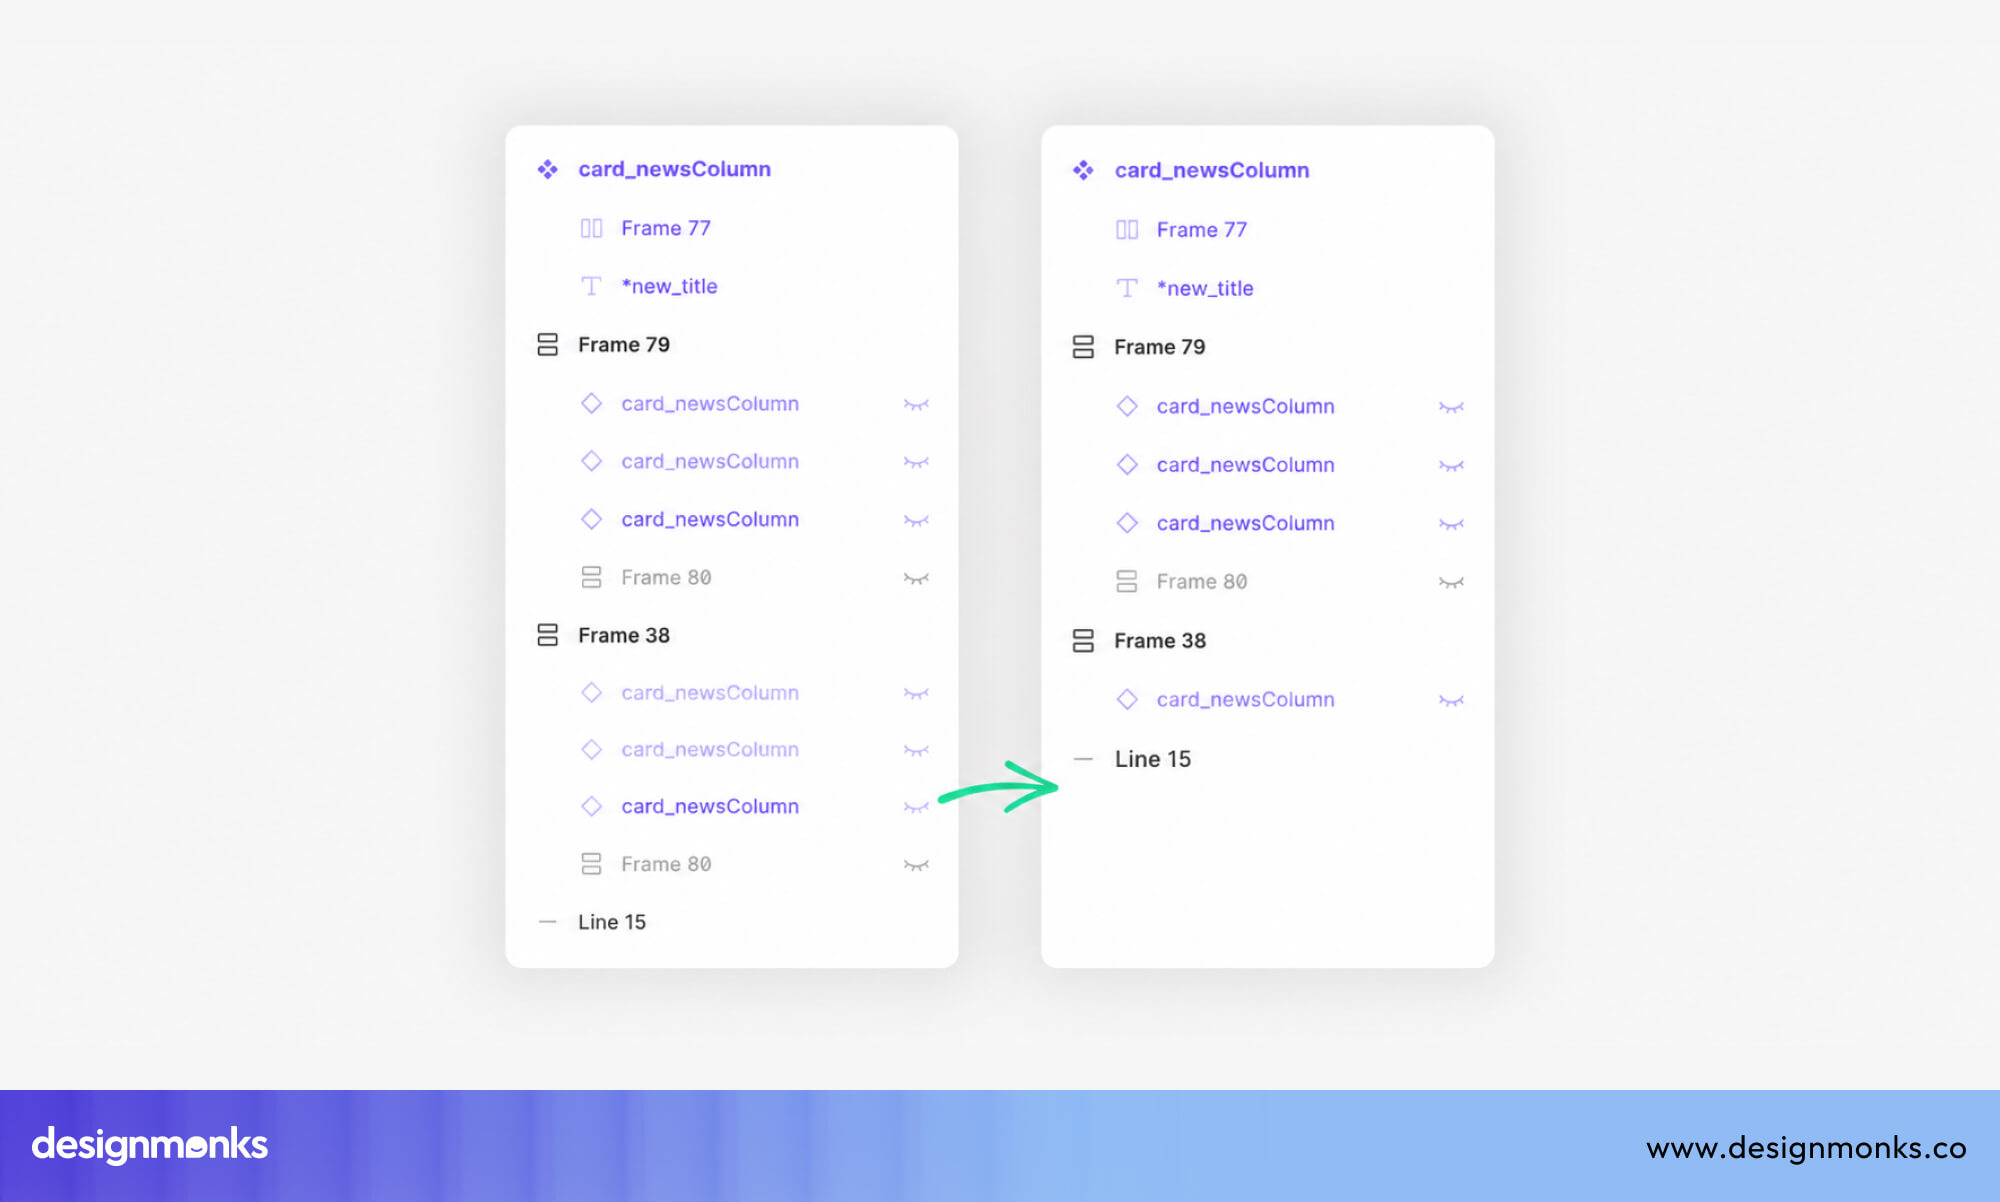
Use Variants Instead of Multiple Separate Components
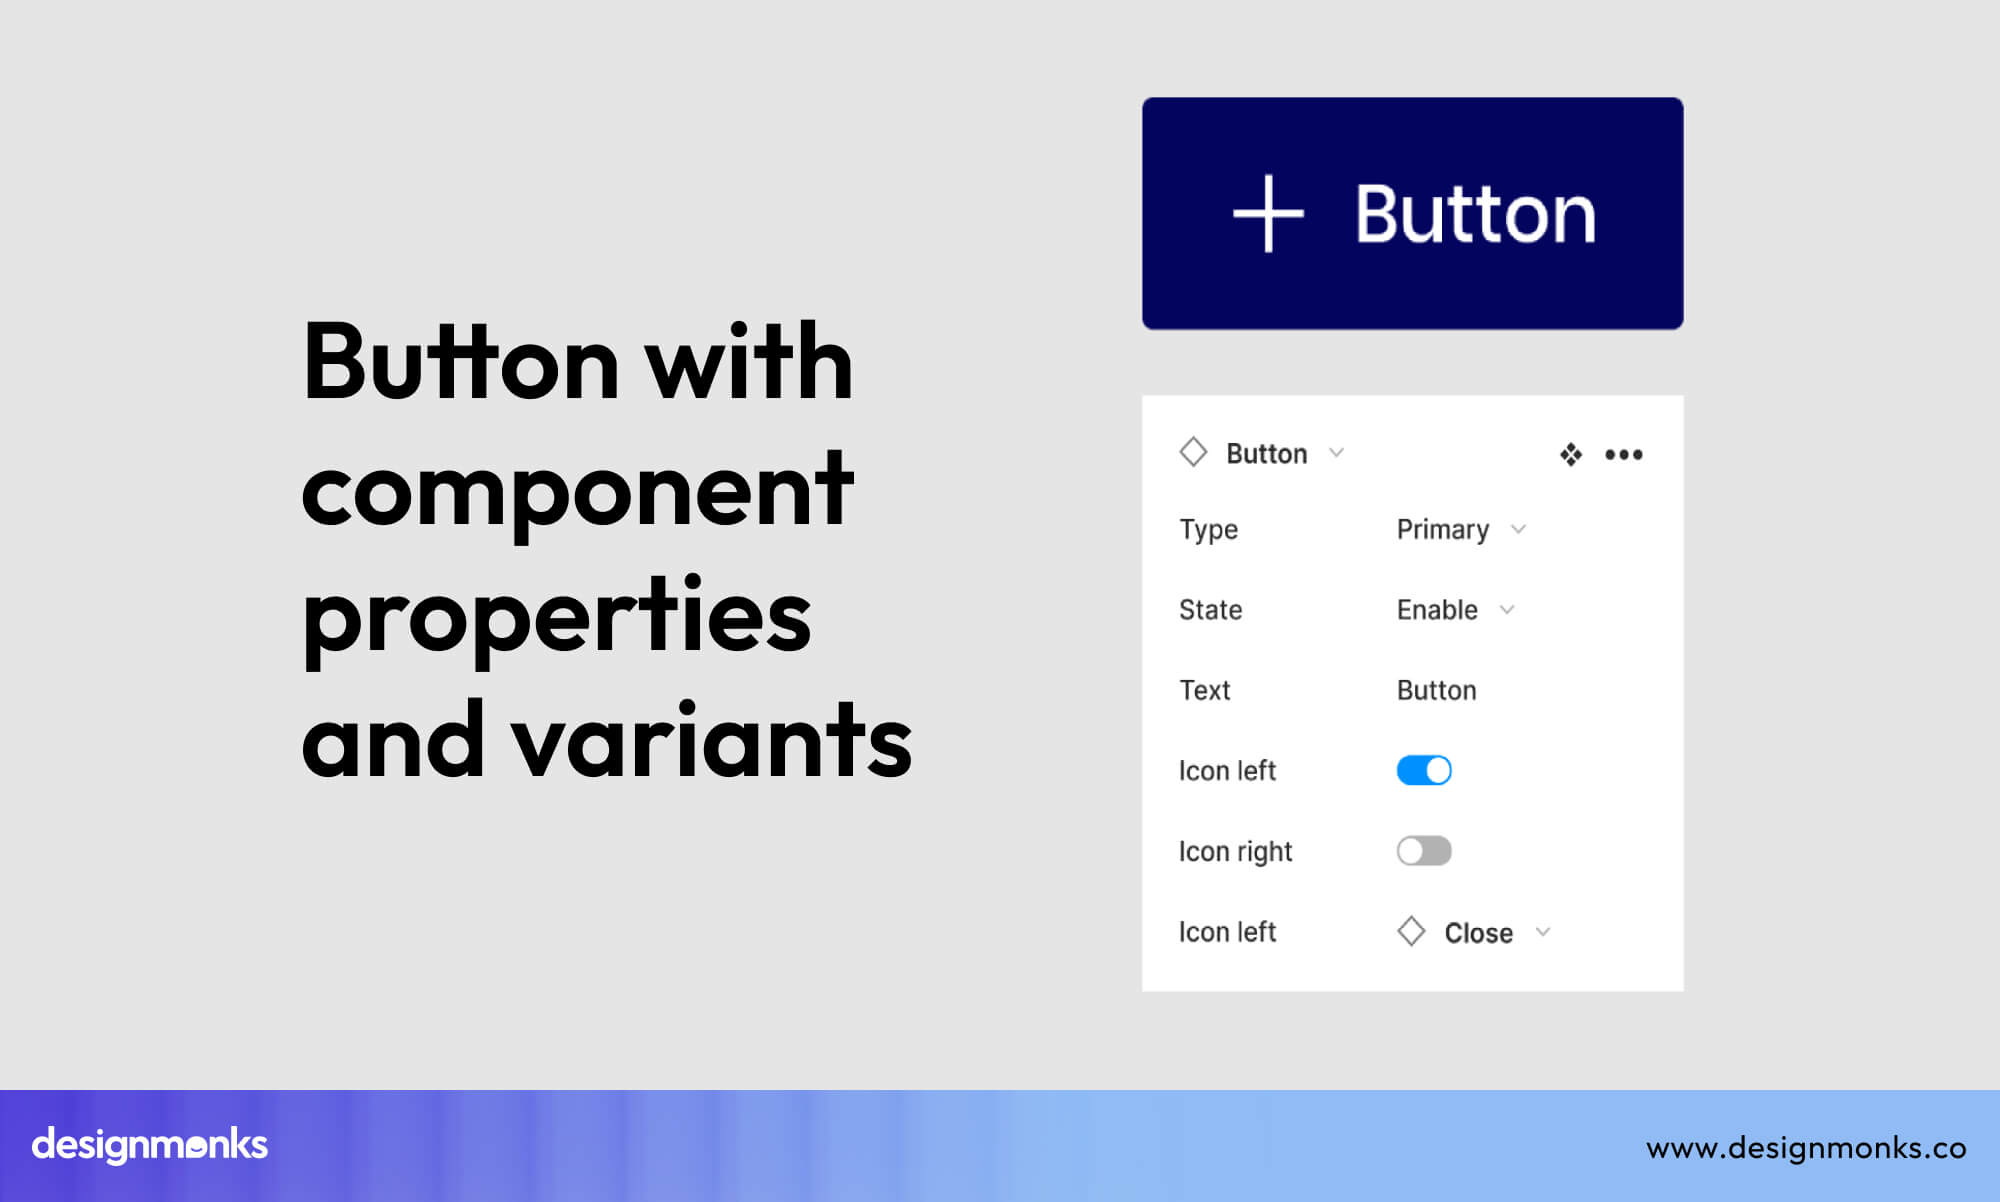
A single UI element can have different states depending on how a user interacts with it. For example, a button might look different when hovered, clicked, or disabled. Instead of creating separate components for each version, you can use variants to group them together.
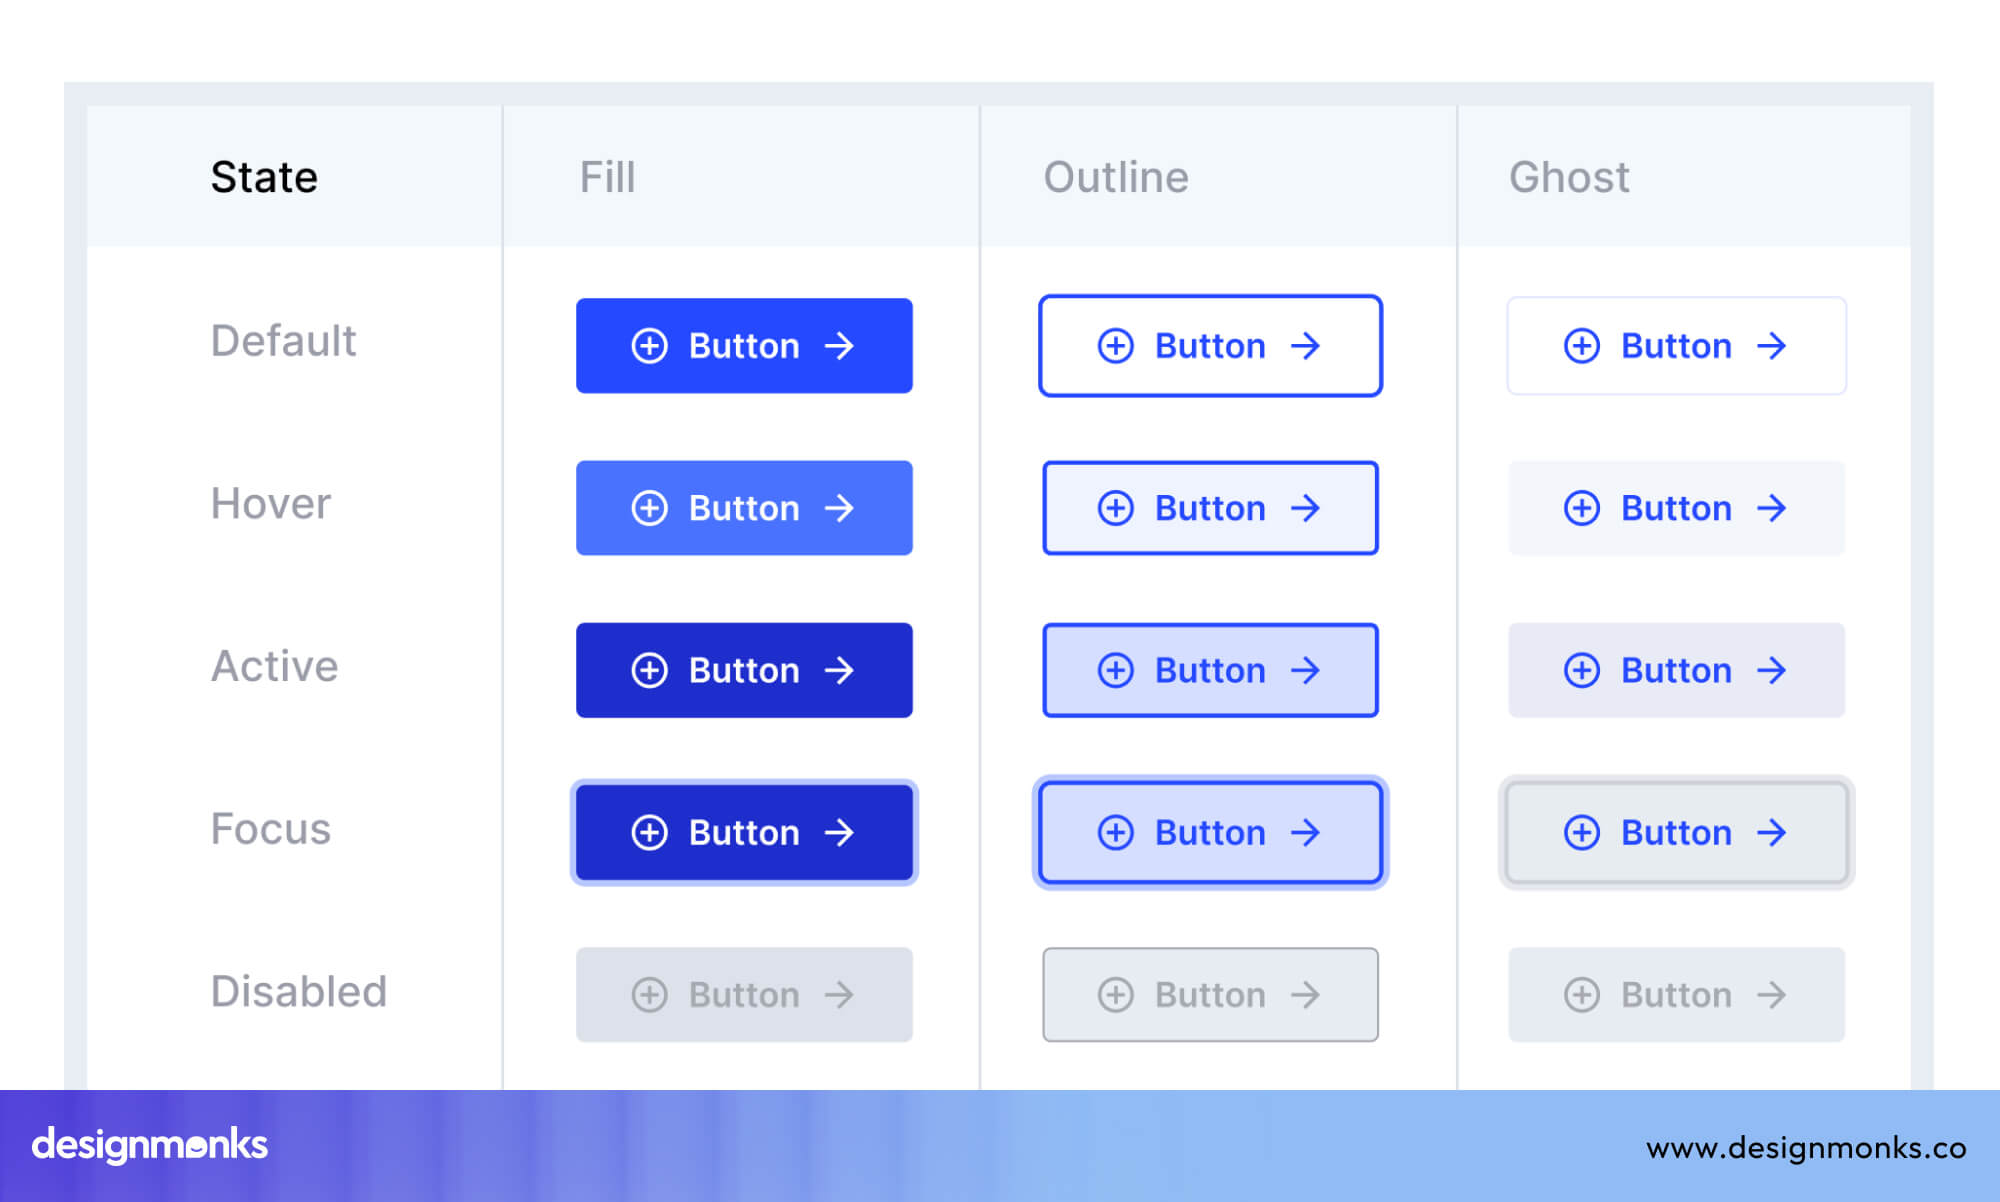
Variants allow you to keep all states and sizes, such as small, medium, and large, inside one organized component. This makes your file easier to manage and removes the clutter that comes from having too many separate elements.
After organizing your components and variants, you can take things even further by sharing them across your team.
Create Shared Component Libraries
A component library is a central place where all your reusable elements are stored in one shared Figma file. When your team uses the same library, everyone works with the same design pieces, which keeps everything consistent.
Any update made to the library is reflected across all connected files automatically. This speeds up team workflows. It also prevents duplicate work and small design differences from appearing in different parts of the product.
Use Variables and Design Tokens for Scalable Design
Making changes across a large design file can take a long time when colors, fonts, and spacing are applied manually to each element. Variables solve this problem. A variable in Figma is a stored value such as a color or number that you can reuse across your design.
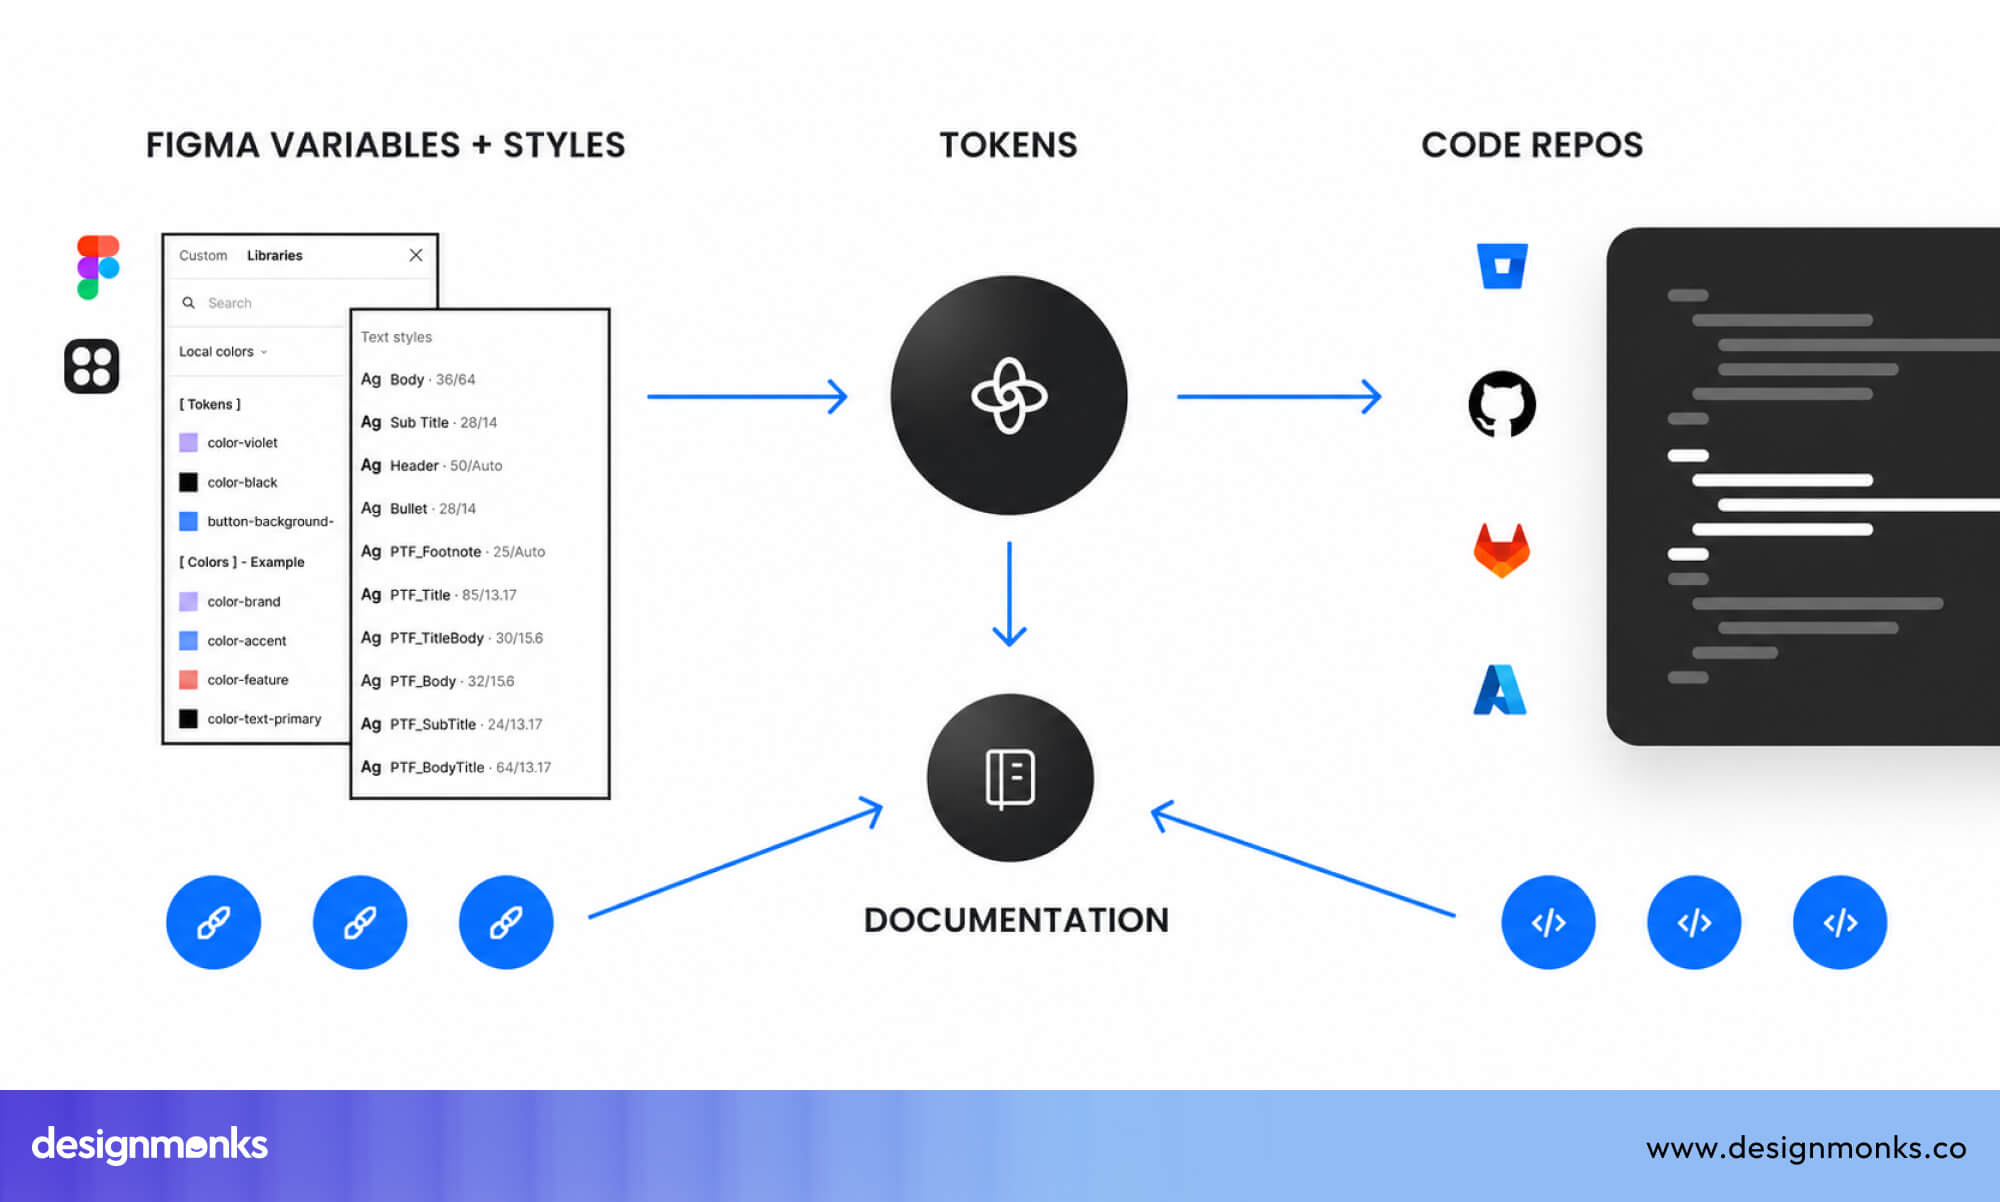
When you update the variable, all elements using it update automatically. Design tokens follow the same idea but are often used in larger systems. It's a conceptual term for the translation layer between design and development.
Create Global Color Variables
A global color variable is a single color value that you name and store, then apply everywhere in your design. Instead of using a raw color code directly on each element, you reference the variable instead.

When your client wants to change the brand color, you update one variable, and the change applies across the entire file instantly. This simplifies theme changes, keeps colors consistent across all screens, and removes the need for repetitive manual edits every time something needs updating.
Use Typography and Spacing Tokens
The same system can be applied to text and spacing. Typography tokens store values like font size, weight, and line height, while spacing tokens store padding and margin values.
Using these tokens ensures that all text styles and spacing follow consistent rules. This makes it easier to maintain structure and reduces confusion when adding new screens.
Build Responsive Systems with Variables
Variables can also support different screen sizes. You can assign different values for mobile and desktop under the same variable name. When switching between devices, the layout updates automatically based on those values.
This reduces manual adjustments and makes responsive design faster.
Learn Keyboard Shortcuts and Quick Actions
Design speed is also affected by how you interact with Figma. Using the mouse for every action slows down your workflow. Keyboard shortcuts and Quick Actions reduce the need to open menus and help you work faster.
Most Useful Figma Shortcuts for Daily Work
Several shortcuts are used repeatedly in daily work. Press F to create a frame, Ctrl/Cmd + D to duplicate elements, Ctrl/Cmd + G to group layers, and Ctrl/Cmd + F to search within a file.
These shortcuts reduce the number of steps needed for common tasks and save time during design work.
Use Quick Actions to Navigate Faster
Quick Actions allow you to run commands without navigating menus. By pressing Ctrl/Cmd + /, you can search for any feature, plugin, or tool inside Figma. This reduces time spent looking through menus and keeps your workflow direct and focused.
Customize Your Workflow Around Speed
Speed improves when shortcuts are used consistently. Repeated use helps build muscle memory, which reduces the need to think about each action. It is also important to avoid switching between unrelated tasks frequently, as this slows down progress. Staying focused on one type of work at a time improves efficiency.
Use Figma Plugins Strategically
Plugins are add-on tools that connect to Figma and handle specific tasks for you. They can fill your designs with real content, generate icons, check accessibility, and automate many repetitive actions that would otherwise take significant manual effort.
Used correctly, plugins remove entire categories of slow, repetitive work from your process. However, choosing the right and best set of Figma plugins matters far more than simply using a large number of them.
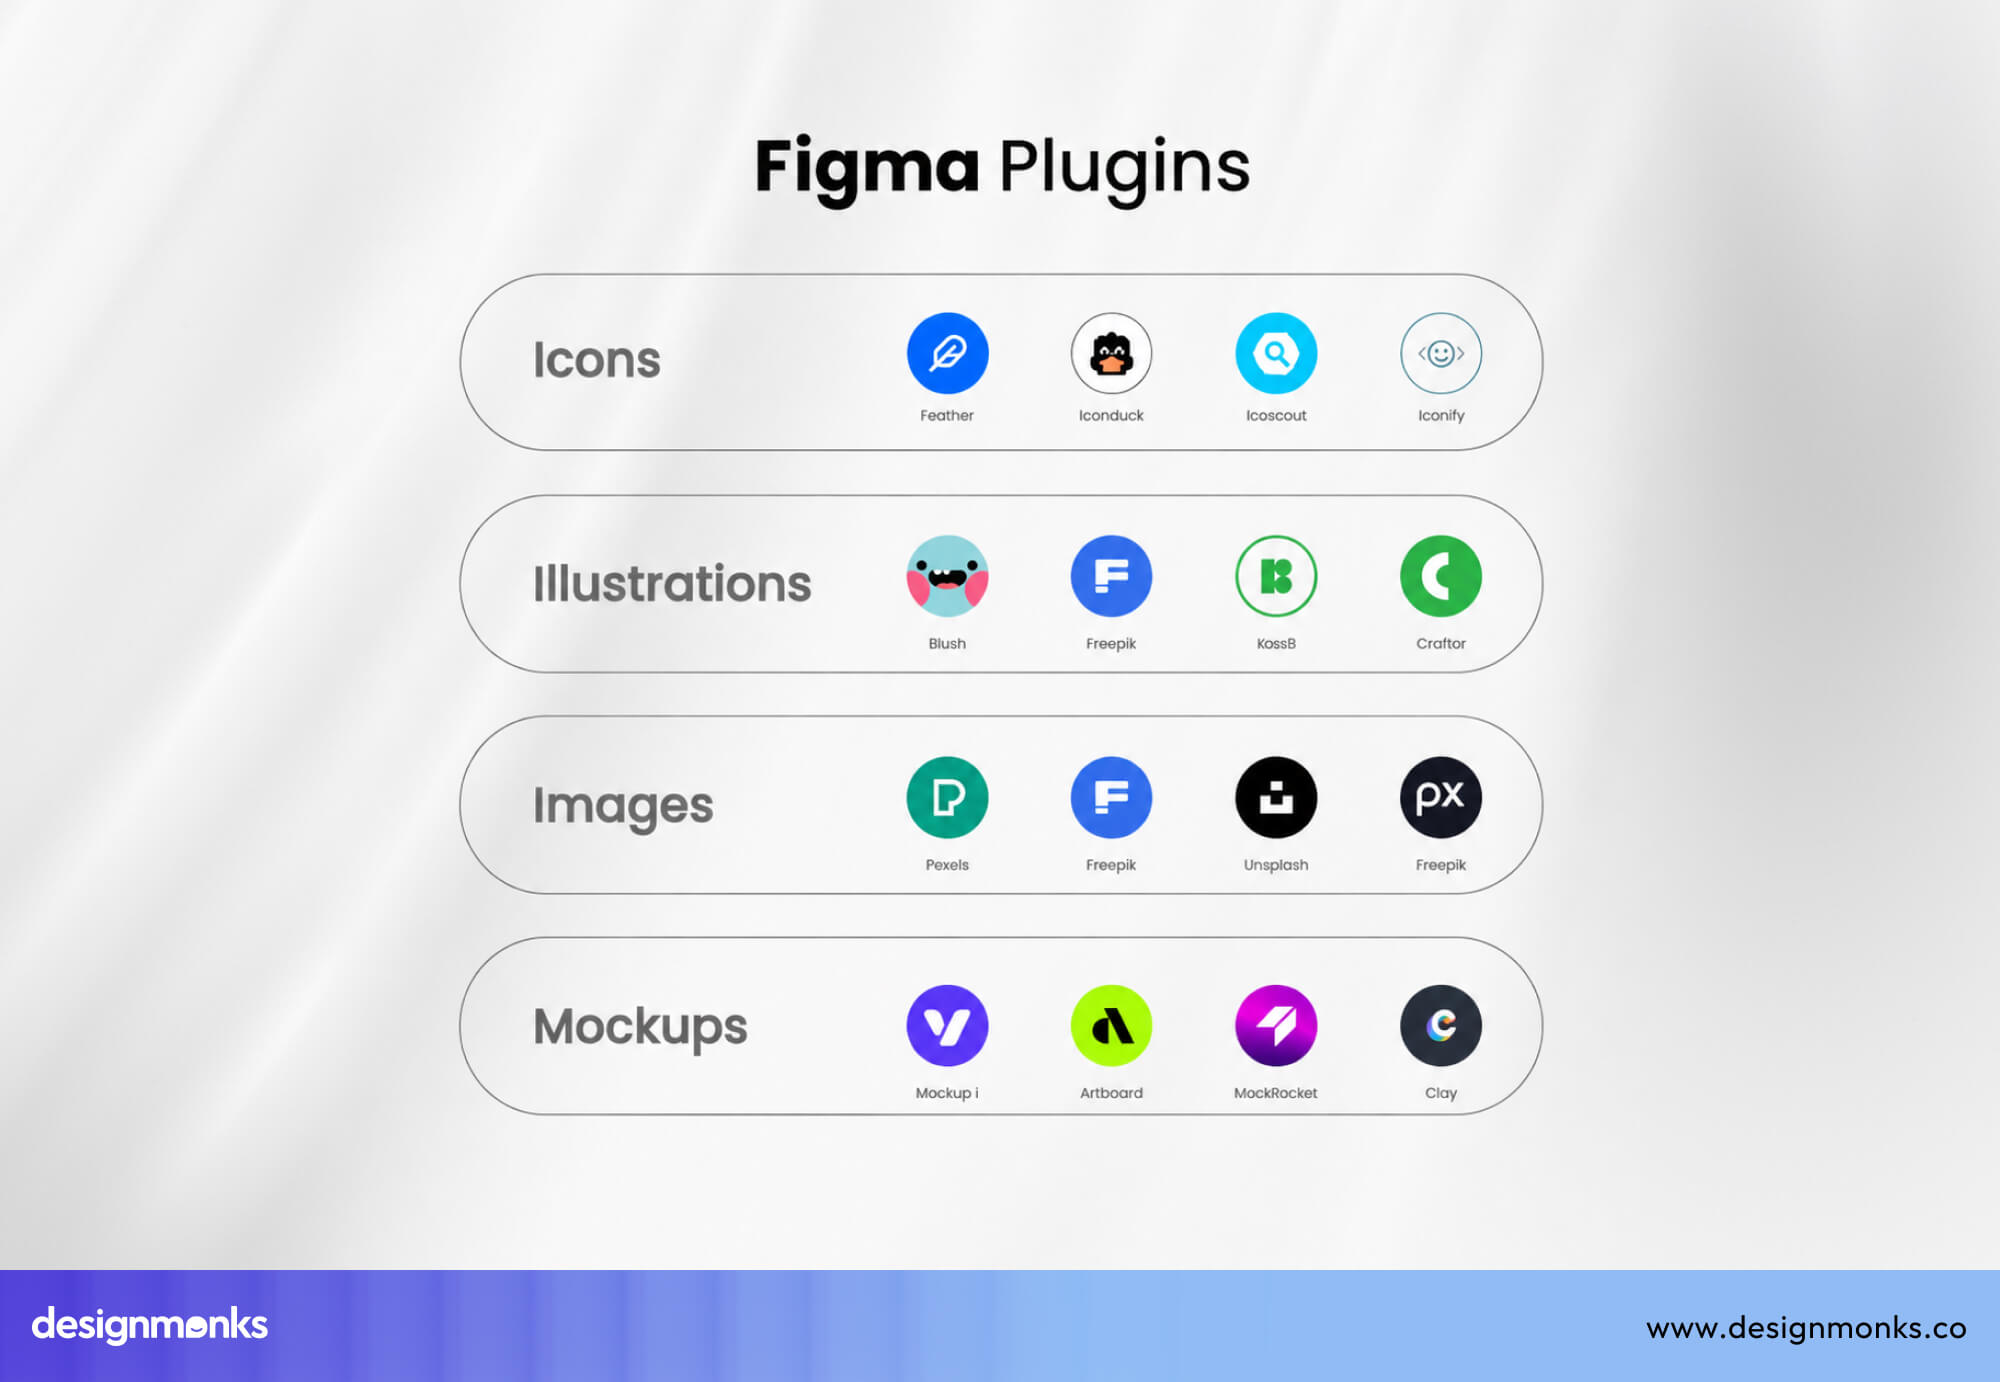
Best Plugins for Faster UI Design
Icon plugins like Iconify give you access to thousands of icons directly inside Figma without switching to another tool or downloading files separately. Content generator plugins fill your designs with realistic text, names, images, and data so your mockups look accurate instead of being filled with generic placeholder text.
Mockup tools let you place your designs inside phone or laptop frames instantly for presentations. Accessibility checkers review your color contrast and flag readability issues directly inside Figma, saving you from discovering problems late in the process.
Avoid Plugin Overload
Just because there are plugins, dont go overboard with them. Using too many plugins can slow down your workflow. A large plugin list makes it harder to find the right tool and can also affect file performance.
It is better to keep only the plugins you use regularly and remove the rest.
Automate Repetitive Design Tasks
Plugins are most valuable when they handle tasks that would take a long time to do manually. You can automate repetitive design tasks by using them.
Bulk edit plugins let you rename multiple layers at once instead of clicking on each one individually. Content population plugins fill entire screens with realistic data in seconds, which is especially useful when designing tables, lists, or card layouts.
Asset generation plugins can export multiple versions of an image or icon in different sizes and formats automatically. This removes the need to configure each export one by one.
Design with UI Kits and Prebuilt Systems
Starting a design project from a blank file takes time, especially when basic elements need to be created again. To reduce this effort, designers often use UI kits and prebuilt systems.
These provide ready-made components and layouts, so you can focus on solving the design problem instead of rebuilding common elements.

Use Internal Design Systems First
Before creating anything new, check if a design system already exists. A design system is a collection of components, colors, fonts, and rules used across a product.
Using these existing assets keeps your work consistent and reduces the need to recreate elements. It also helps developers, since they are already familiar with these components.
Customize Existing UI Kits
If there is no internal design system available, using a third-party UI kit is a practical way to start. A UI kit includes pre-designed components and layouts that you can adjust to match your project needs.
Instead of building everything from scratch, you can update colors, fonts, and remove parts that are not required. This approach reduces setup time and keeps your workflow more efficient.
For example, you can explore ready-made options like mental health app UI kits to understand how structured kits can speed up your design process.
Build Your Own Reusable Starter Kits
Over time, creating your own starter kits becomes useful. These can include common layouts such as landing pages, dashboards, or mobile screens. Starting with a prepared file means you do not need to repeat the same setup work for every project.
This helps you move faster and maintain consistency across similar designs.
Prototype Faster Without Overengineering
After designing screens, the next step is testing how they work. Prototyping allows you to connect screens and simulate user interactions. However, spending too much time on detailed animations early on can slow down progress. Keeping prototypes simple helps you test ideas faster.
Prototype Core User Flows First
A user flow is the path a person follows to complete a task, such as signing up or making a purchase. Start by connecting the main screens that support these tasks.
Focus on whether the flow works correctly, rather than how polished it looks. This helps identify problems early without spending extra time on details.
Use Interactive Components
Interactive components allow you to reuse behaviors across multiple screens. For example, a dropdown or button interaction can be built once and reused everywhere.
This reduces the need to manually connect interactions for each screen and makes updates easier.
Test Early Instead of Perfecting Screens
Waiting until screens are fully polished before showing them to users is one of the most common ways designers waste time. Testing early with a rough prototype helps to find real problems before too much work has been invested.
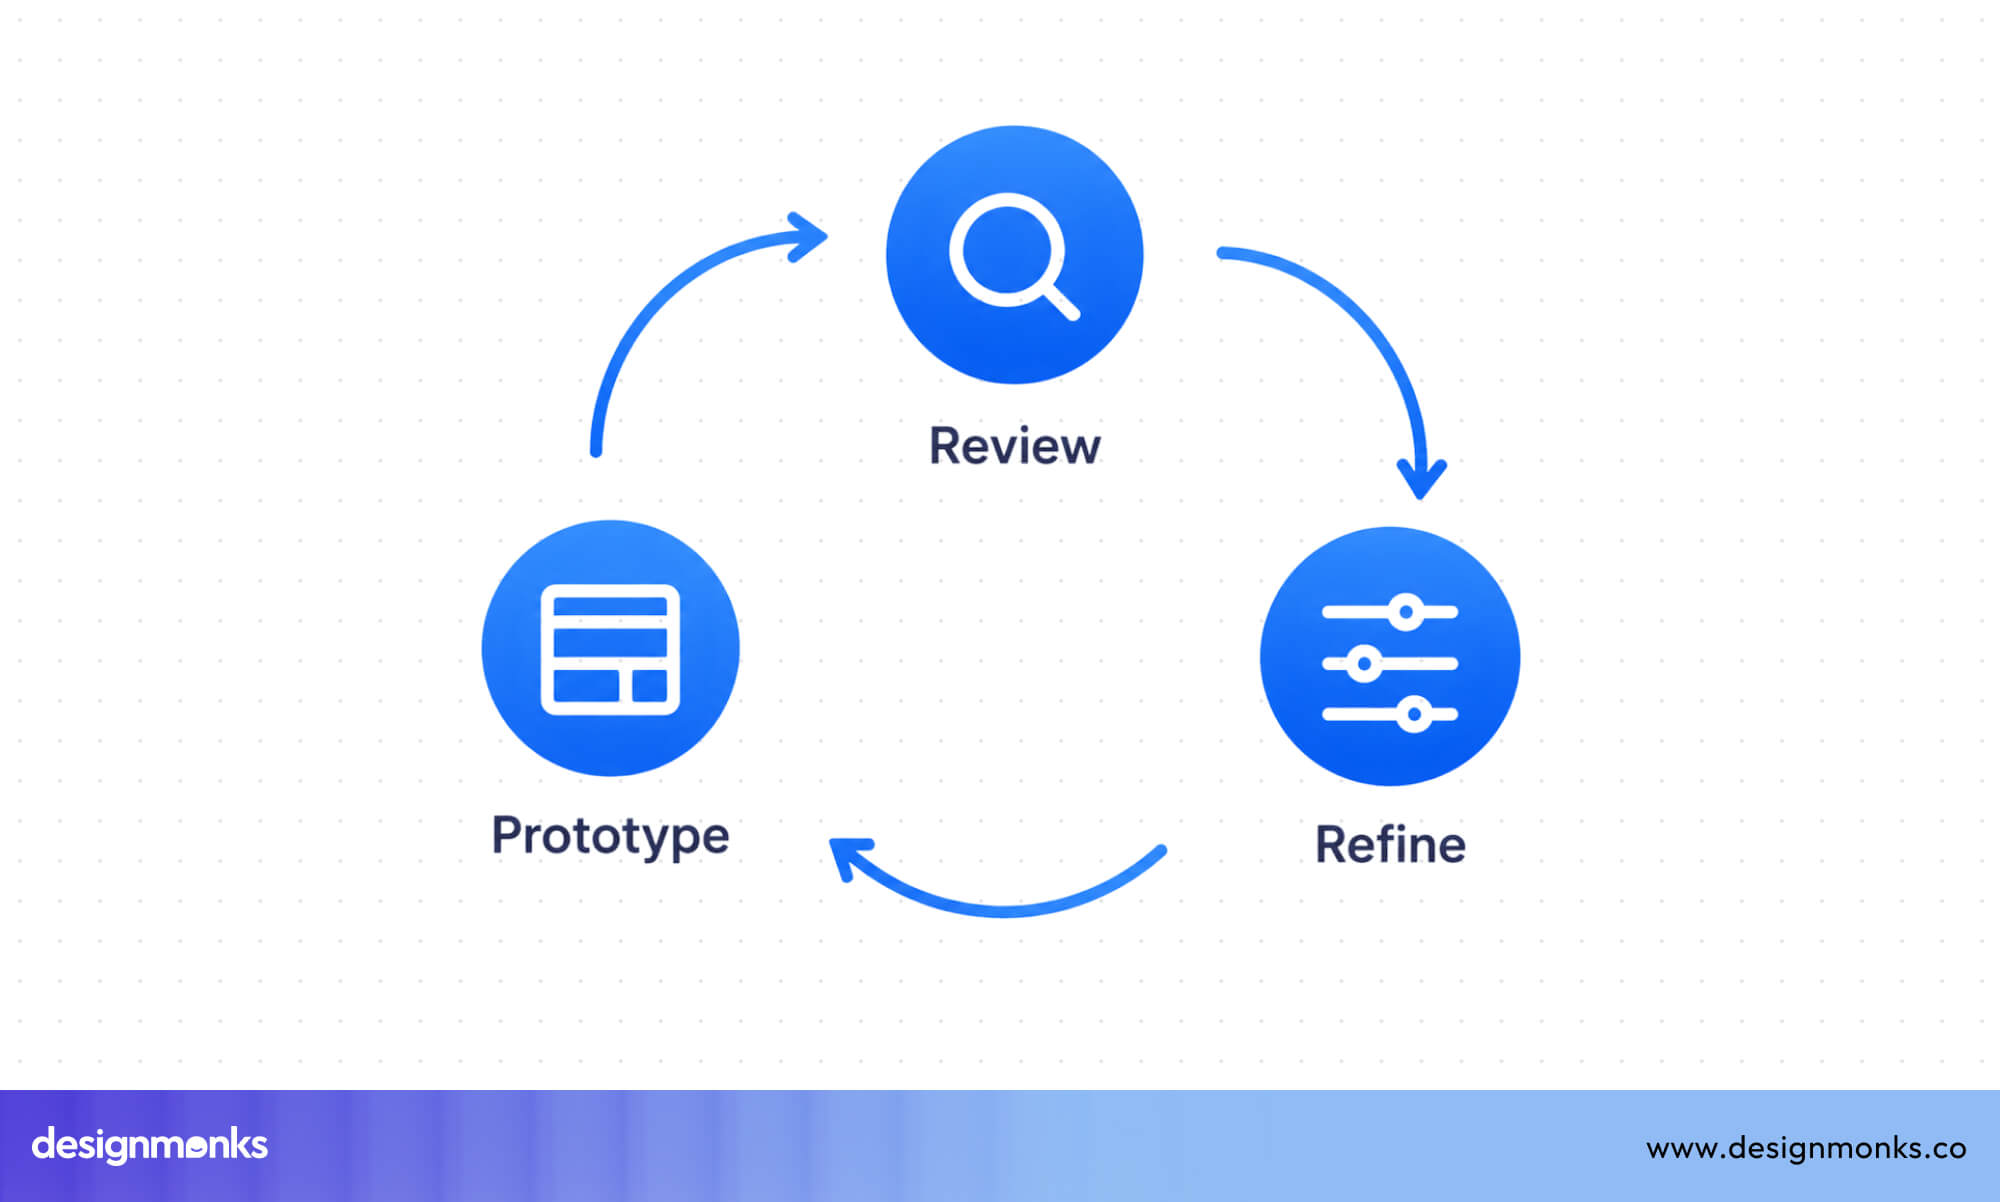
Each round of testing and fixing is called an iteration cycle. Shorter and faster iteration cycles lead to better final products. Testing early also reduces wasted effort because you discover what needs to change before spending hours refining something that will need to be redesigned anyway.
Validating the user experience early means your final high-fidelity screens are built on a confirmed, working foundation.
Collaborate Faster with Teams and Developers
Design work involves multiple people, including stakeholders, team members, and developers. Without a clear system, communication issues can slow down progress. Using Figma’s collaboration features helps reduce delays and keeps feedback organized.
Use Comments for Async Feedback
Figma allows users to leave comments directly on designs. This enables team members to review and respond at different times without needing meetings.
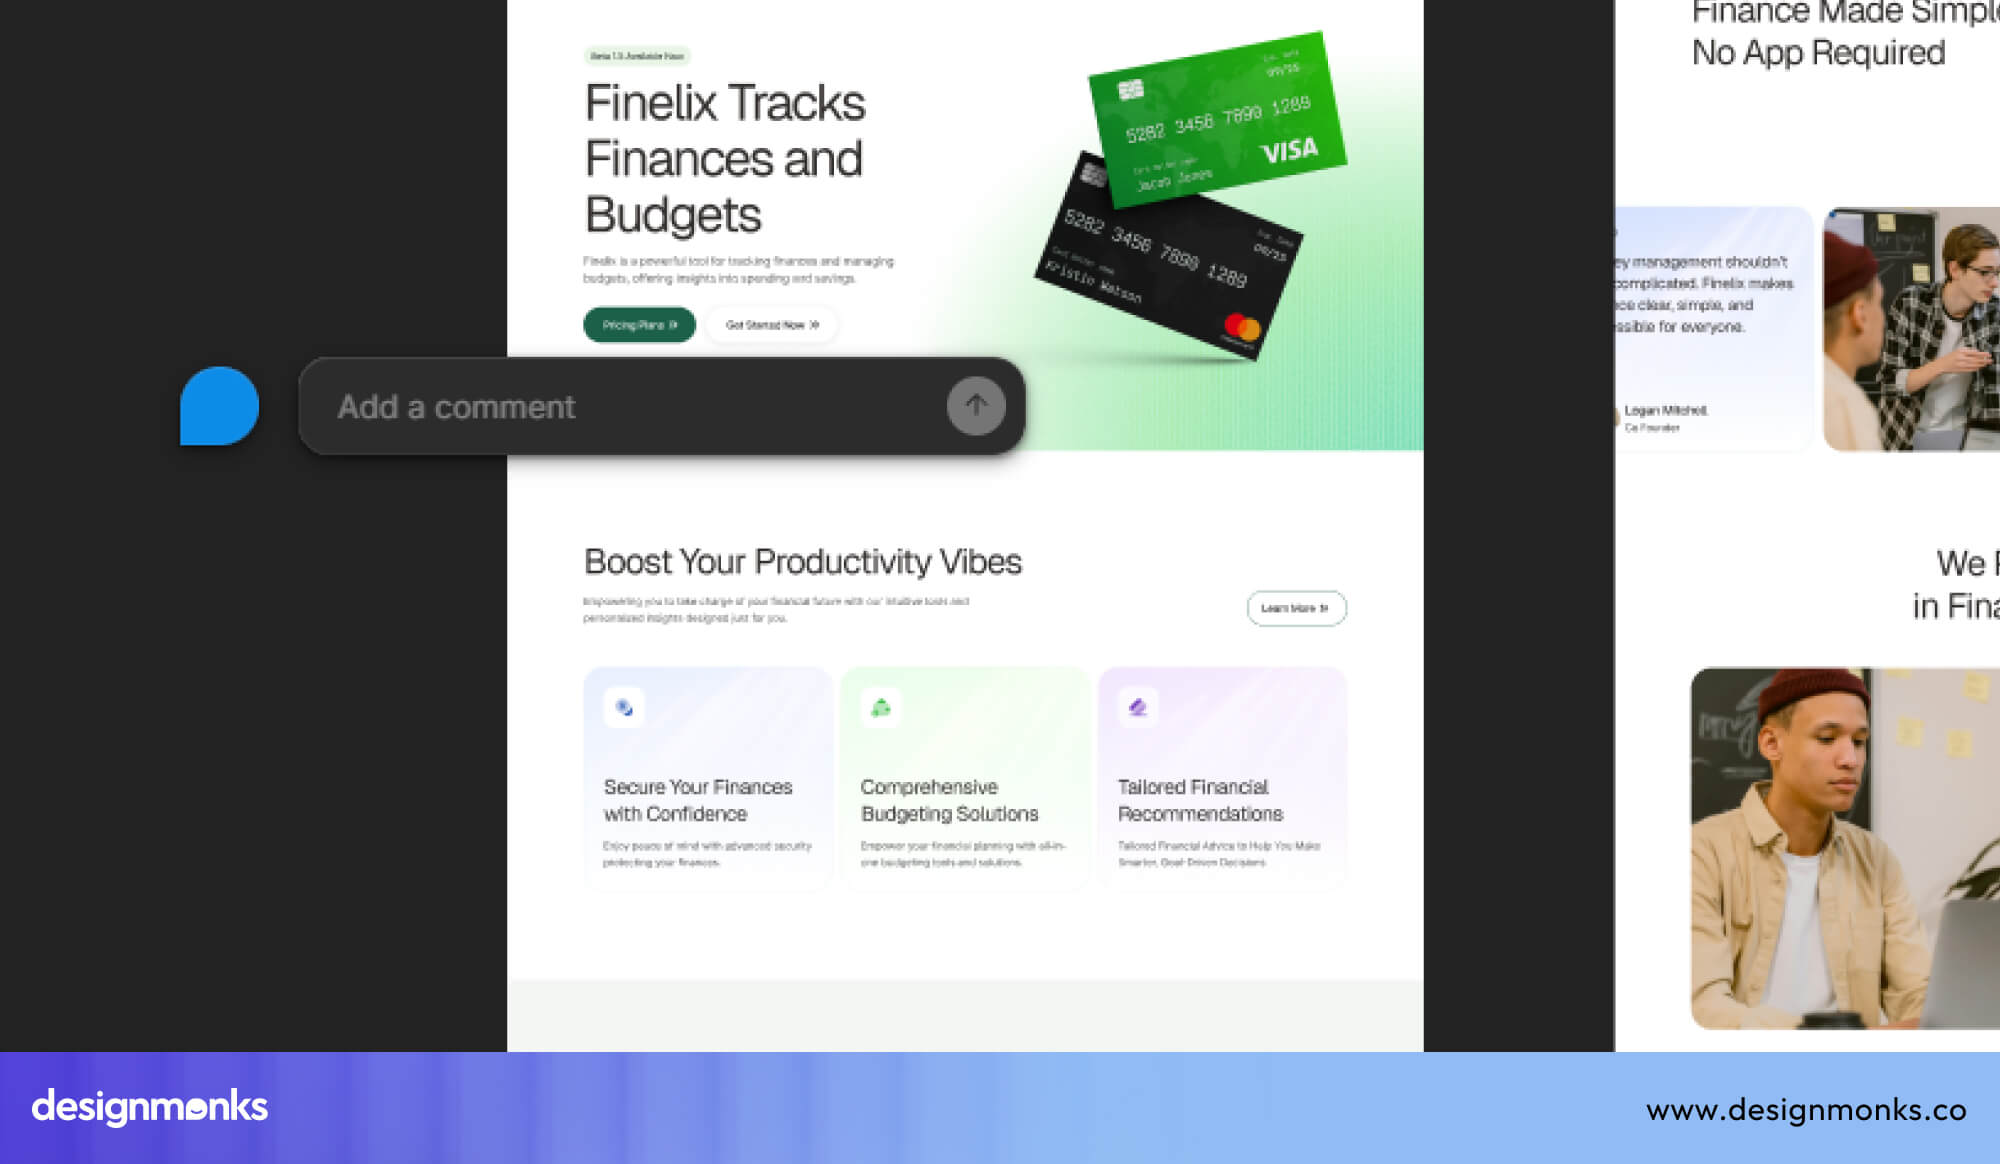
Feedback stays linked to specific parts of the design. This makes it easier to track and apply changes.
Improve Developer Handoff with Dev Mode
Dev Mode provides developers with design details such as spacing, colors, fonts, and assets. Sharing designs in this format reduces the need for repeated clarification.
Developers can access the information they need directly, which improves accuracy and speeds up implementation.
Use Branching for Larger Projects
Branching allows designers to work on changes in a separate version of the file. Once the work is reviewed, it can be merged into the main file. This prevents conflicts when multiple people are working on the same project and keeps the main file stable.
Optimize Figma Performance to Reduce Lag
As design files grow, performance can slow down and create lag. This Lag affects how quickly the editor can respond. But managing file size and complexity can help maintain a smooth workflow.
Remove Unused Assets and Components
Over time, Figma files collect unused components, hidden layers, and old styles. You may not notice them, but they make the file heavier and slower. Because of this, your file takes longer to load and respond.
To fix this, clean your file regularly. Remove components you no longer use and delete hidden or empty layers. This keeps your file light and easy to work with. Doing this from time to time helps prevent performance issues later.
Split Large Files into Smaller Systems
Even after cleaning your file, it can still feel slow if it becomes too large. This usually happens when everything is stored in a single file.
A better approach is to split your work into smaller files. For example, you can keep colors and text styles in one file, components in another, and screens in a separate file. These files can still be connected using Figma libraries.
As a result, each file loads faster and is easier to manage.
Optimize Images and Effects
Along with file size, images and effects can also slow things down. Large images and heavy effects like blur or shadows use more power and make the editor less responsive.
To improve this, compress your images before adding them to Figma. You can also reduce heavy effects or use simpler ones when possible. This helps your file run smoothly and keeps your design process fast and easy.
Use AI and Automation to Speed Up Design Work
AI tools can help you work faster in certain parts of the design process. They can create layout ideas, write content, and handle repeated tasks quickly. However, AI is only a support tool. It helps you, but it cannot replace your thinking or decisions as a designer.
Use AI for Wireframes and Content Ideas
To start, AI can help you create wireframes. A wireframe is a simple layout that shows where things go on a screen. Instead of building each layout by hand, AI can generate a few options quickly.
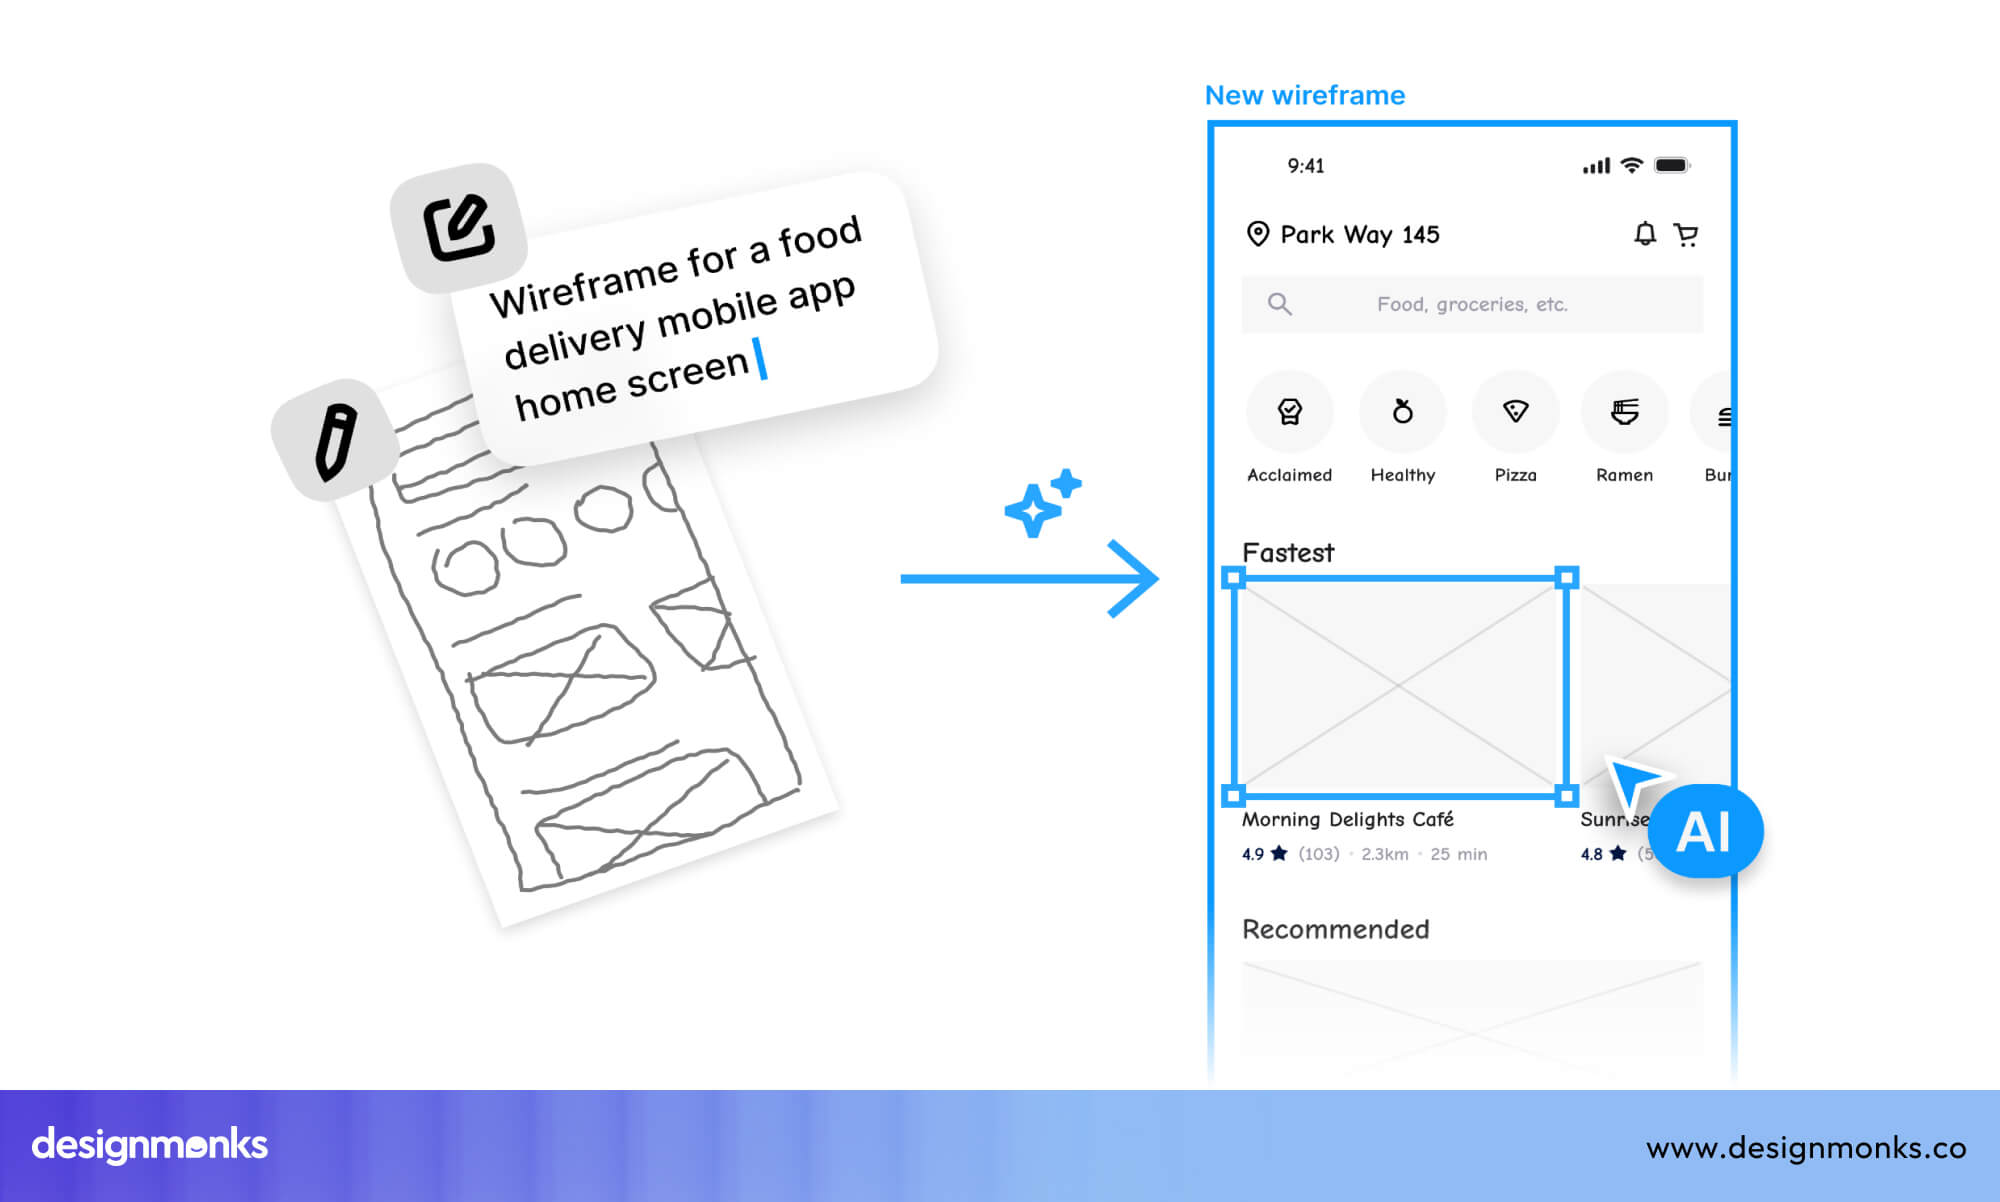
This helps you explore different ideas without spending too much time early on. AI can also create sample text, product names, and descriptions, so your design looks more realistic and easier to understand.
Automate Repetitive UI Tasks
After that, AI can help with repeated tasks. For example, it can create different layout versions from one idea. It can also adjust sizes for different screens or generate multiple design options.
Doing these tasks manually takes a lot of time. By using AI, you can skip the repetitive work and focus on choosing and improving the best option.
Know What Should Stay Human
Even though AI is helpful, some parts of design must stay human. Decisions about how a product should work need a real understanding of users and goals.
Things like user experience, planning, and interaction decisions require human thinking. AI cannot fully understand how people feel or behave. That is why these parts should always be handled by the designer.
Common Mistakes That Slow Designers Down
Even when you use the right tools, some habits can still slow you down. These mistakes often feel normal, but they increase your workload over time. Fixing them can help you work faster and more clearly:
- Designing Everything from Scratch: Starting from a blank file every time takes extra effort. Instead, reuse components, templates, or UI kits when possible. This saves time and keeps your designs consistent.
- Ignoring Design Systems: When you do not follow a design system, your work can become inconsistent. This leads to more changes later. Using a design system from the start keeps everything aligned and reduces extra work.
- Poor Layer Organization: Unorganized layers make it hard to find and edit elements. Naming and grouping layers properly keeps your file clear. This makes updates faster and easier.
- Overusing Plugins: Using too many plugins can slow you down instead of helping. It becomes harder to find the right one, and some plugins affect performance. Keeping only useful plugins makes your workflow smoother.
- Building High-Fidelity Screens Too Early: Creating detailed designs too early can lead to rework. If the structure changes later, you may need to redo everything. Starting with simple layouts helps you make changes faster and decide better.
Work Faster with the Right Design Team
While these methods can help you design faster in Figma, speed also depends on experience. Knowing what to do, what to skip, and how to structure work comes with practice.
This is where working with an expert team can make a big difference. Teams that follow structured workflows, reusable systems, and efficient design processes are able to deliver high-quality work without delays.
For example, teams like Design Monks focus on building scalable design systems, using proven workflows, and reducing unnecessary steps. This allows them to complete projects faster while maintaining strong design quality.
Instead of spending time fixing messy files or redesigning the same components again, experienced designers work with systems that keep everything organized and efficient from the start.
If speed, consistency, and reliability matter to your project, working with Design Monks can save both time and effort.
Final Thoughts
Designing faster in Figma is not about rushing your work. It is about removing unnecessary steps so you can focus on what matters. When you apply these 11 ways to design faster in Figma, your workflow becomes more organized and easier to manage. You spend less time fixing files and more time improving your ideas.
Improving speed takes time. By using these methods regularly, your work will become easier with each project. Over time, these small changes can lead to better speed and better results.

.avif)
.avif)
.avif)
.avif)


.avif)
.avif)
.avif)
.avif)


.avif)